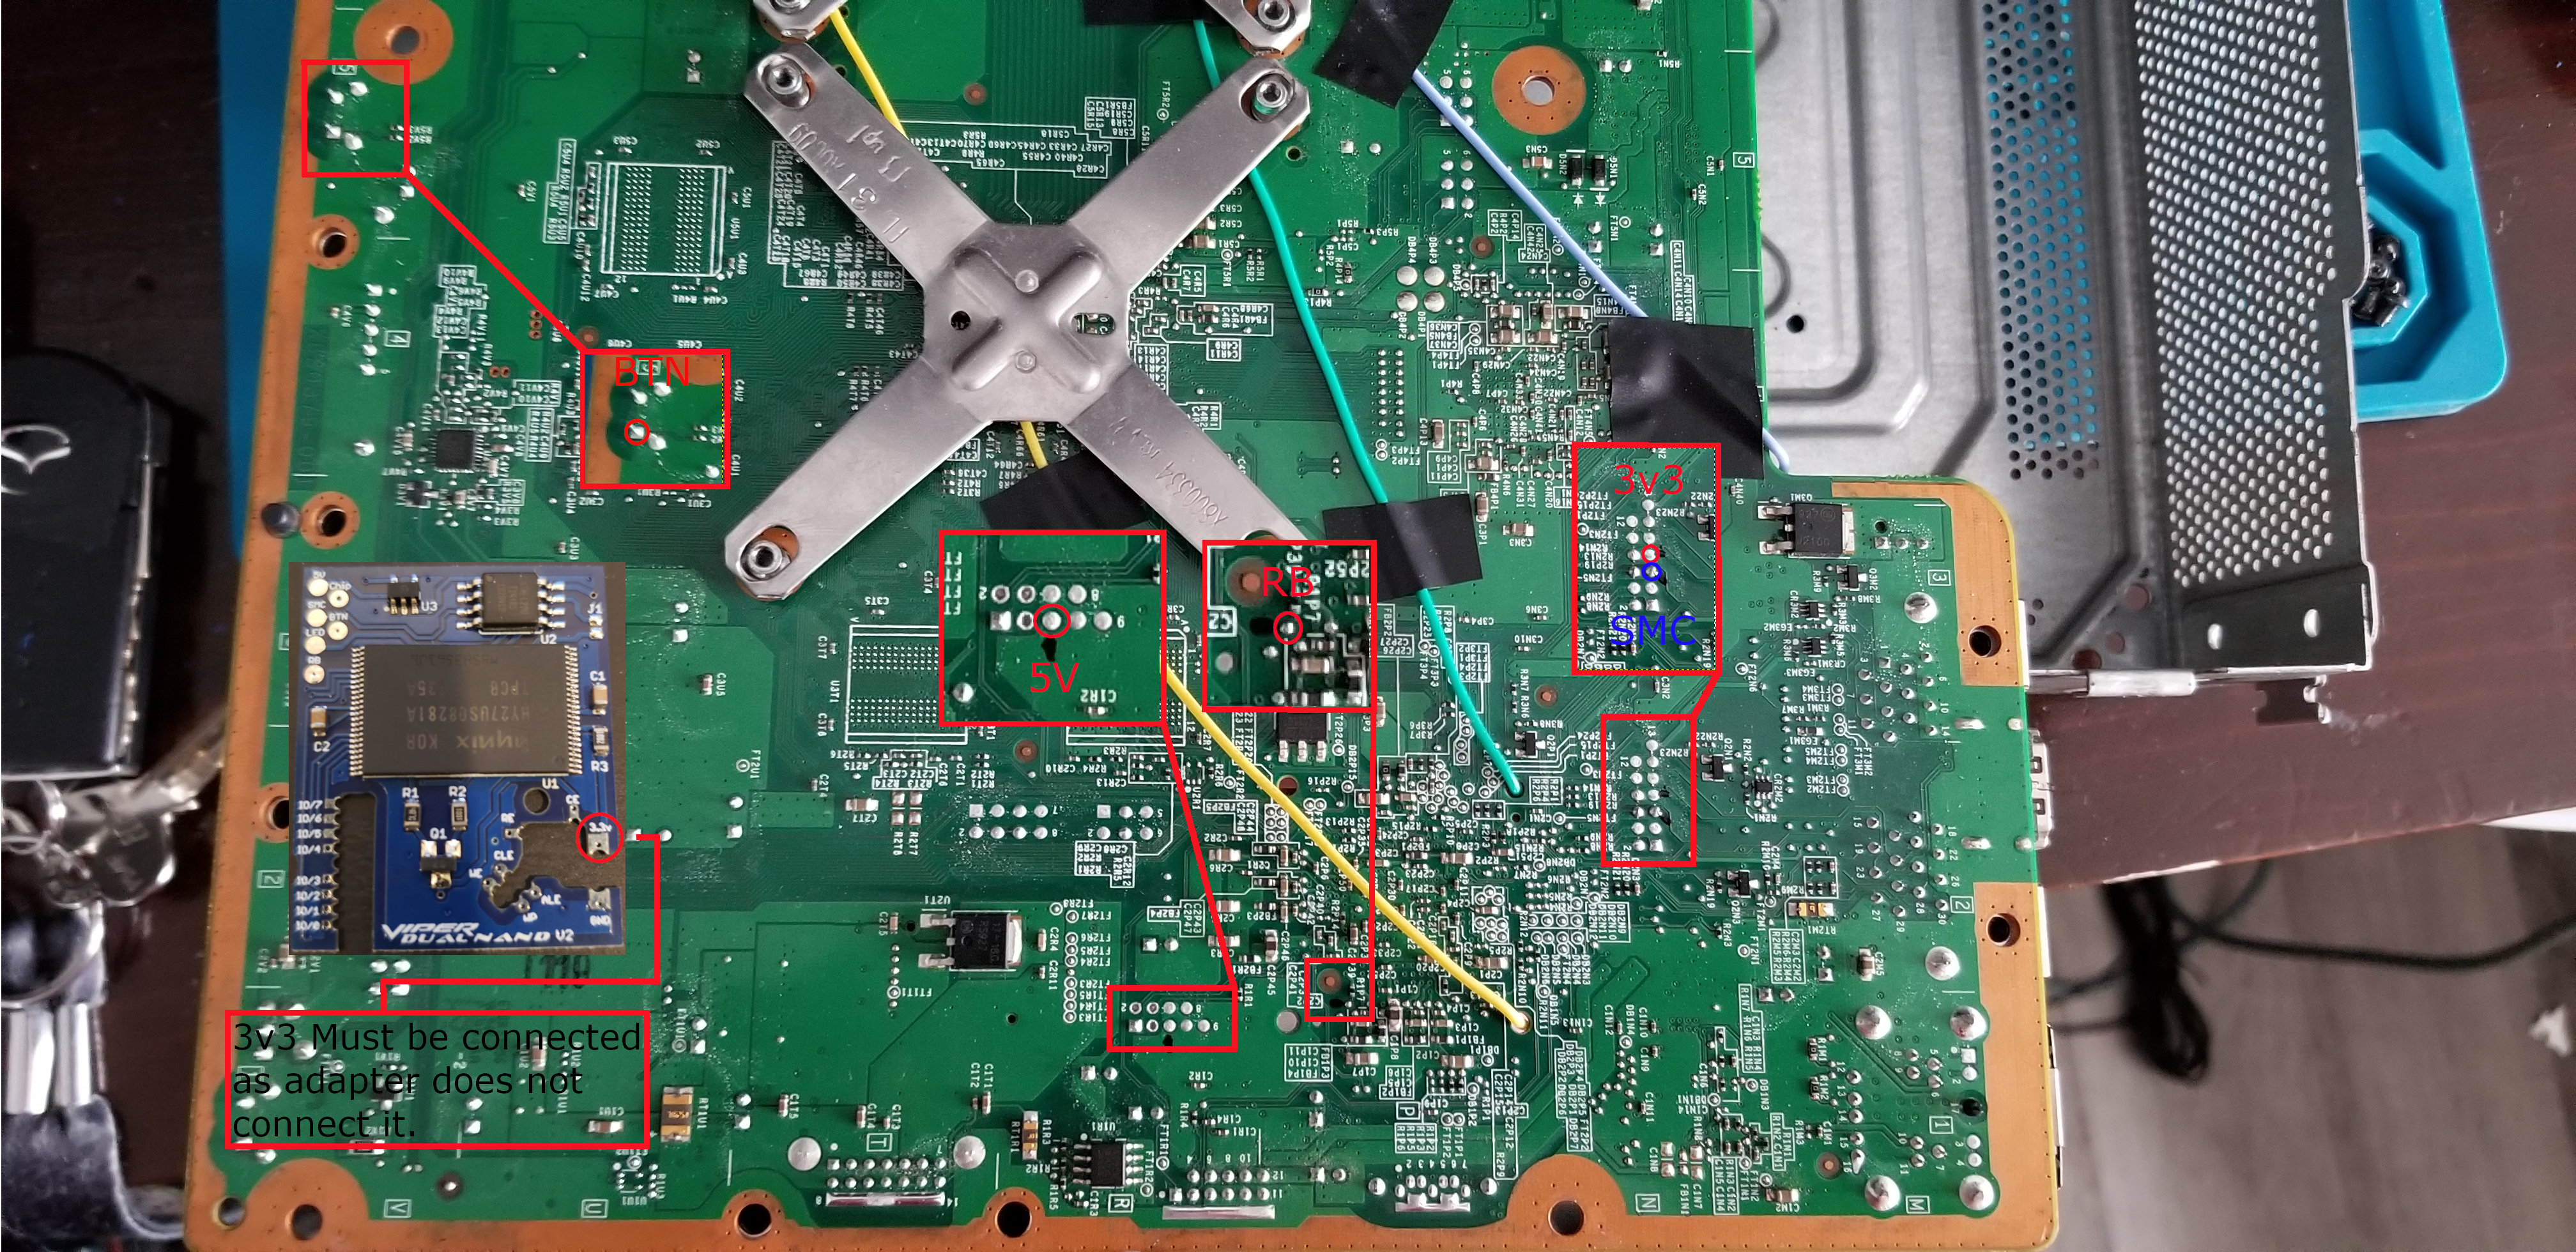
Whats up Guys, I made this little guide for people who want to install a Viper V2 into a phat console. Also I haven’t seen any Install diagrams for the corona or the phat consoles yet. I will be coming out with a corona install diagram as well soon.
Now there are 3 consoles you can use the Viper V2 with as of now:
Trinity – 2 install methods & NO adapter required.
Corona – 1 install method (2 if you use coolrunner with muffin install), adapter required.
Phats – 1 Install method (unless you use 5v based glitch chip for phat), adapter required.
So the original Viper was made for the trinity, it was a moderately difficult to install because of having to solder to many small points on your glitch chip (mainly ace v3) thankfully element revised this version and released the V2. The V2 is great because you dont have to solder to resistors on your glitch chip now. The only part people may find difficult is soldering in your nand indicator LED, which will be covered.
Things you will need:
- Viper Dual Nand V2
- Phat Adapter
- JRP or NAND-X
- Soldering Iron, flux etc.
- 26awg – 30awg wire (26 for positive and ground, 30 for the rest of the points)
- Skills and patience
So to start off, you want to strip your console down to the bare motherboard, and flip it over to the bottom side.Take your Phat adapter and set it on like so
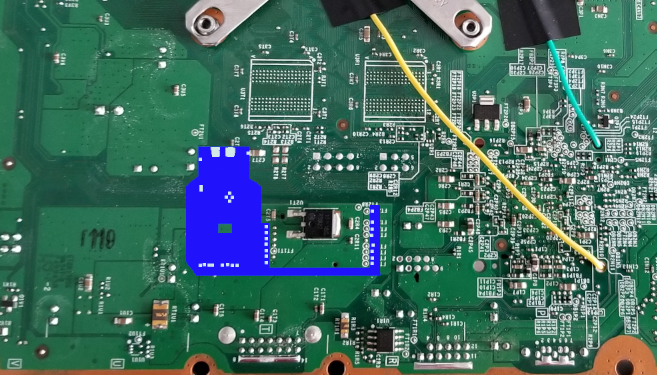
Tape or even hot glue it down to anchor it, so you can solder in the nand points, and the ground near the bottom of the adapter.Once you got that down and anchored, set the Viper Dual Nand V2 on the adapter like so.
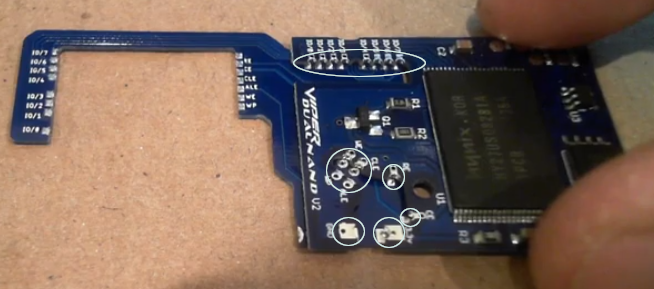
Once All your points are soldered, and you are happy with how it is, always be sure to double check your points. You dont want to get it all back together to realize one of your points isnt good.
Next up is getting the correct points on the actual motherboard connected to the Viper V2.
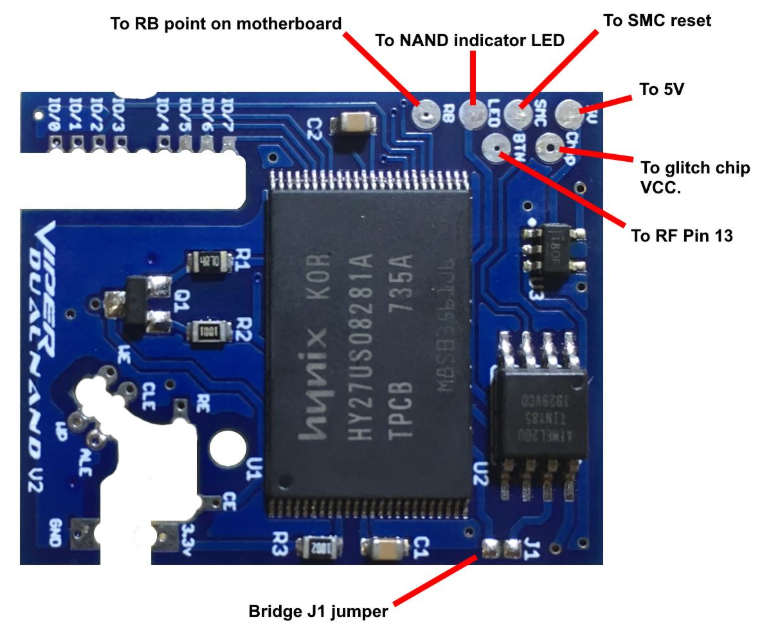
Once you have all of those points soldered in, make sure to solder the “chip” point on the V2 to your Coolrunners 3v3 point (assuming your using a Coolrunner).
The only thing left is your Nand indicator light. BE VERY CAREFUL as the Nand indicator light involves scraping away at the solder mask to essentially create a negative point for you to solder your light to. It is recommended that you get a fiberglass pen to scrape away at the solder mask. However most people might be using a blade of some sort, which is fine but be careful.
You can decide which light you wish to scrape the negative side of, But I recommend the middle light. as always, BE CAREFUL.
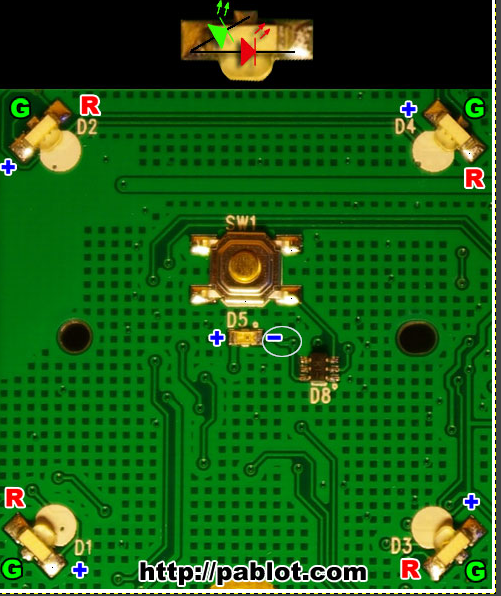
“R” and “G” are negative points, but as I said, I recommend scraping away the circled area (on the trace, NOT THE VIA). Once scraped, apply flux and tin the point. Once tinned, look for the negative side of your LED and solder it in.
Once your light is soldered into your point, be careful as is might be a fragile solder joint (which is to be expected). but now you can solder your wire onto the other side of the LED and wire it into the “LED” point on your Viper V2.
Now your done. Plug the console in (do not turn it on yet) and hold in the sync button. If everything worked out and your soldering is good, then you should see your nand indicator LED flash either once or twice to indicate which nand it is on.
You can now solder your Nand wires in, hold the sync button until you switch the the Viper V2 Nand and write your Hacked image to the Vipers Nand. Then switch back to your consoles Nand and write your retail image to it.
Boom your done, now with the way its set up, if you want to revert your console back to retail, all you have to do is remove all chips.
Big thanks to TheModShop for providing is with the Viper, Viper V2, and the adapters. Thanks to TheWeekendModder for being a reseller of these chips to the North American region.

