Please keep in mind, this tutorial is designed for people who already have RGH experience. It is strongly not recommended to do a Zephyr as a first console. Do a Falcon or Jasper first.
ECC and XeBuild Info:
Read NAND as normal (2 dumps, make sure they match)
J-Runner with Extras will auto load the correct Falcon ECC when you click Create ECC.
If you are using a different J-Runner, then load it manually from Custom Nand Functions. The file is located in common/ECC/FALCON.ecc
Then, write the ECC as normal.
Get the CPU key like normal after installing the chip.
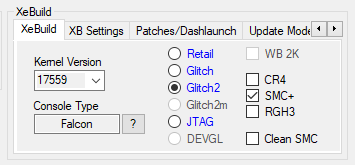
Before clicking ‘Create XeBuild image’, J-Runner with Extras will automatically switch the motherboard to Falcon.
If you are using a different J-Runner, switch the motherboard to Falcon manually.
SMC+ is strongly suggested to improve booting performance
Timing File Info:
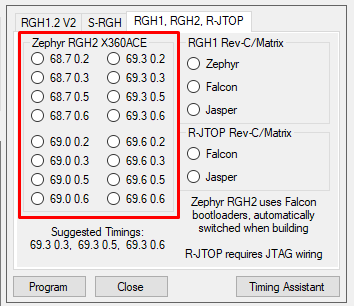
Because we removed the diode and put 1.8V, you must have the Xbox plugged into power in order to program the glitch chip. Or else it won’t work!
I recommend to start with 69.3 0.3. The best timings are:
69.3 0.3
69.3 0.5
69.3 0.6
If using J-Runner with Extras, you can program the timings from the Program Glitch Chip button
Install Guide:
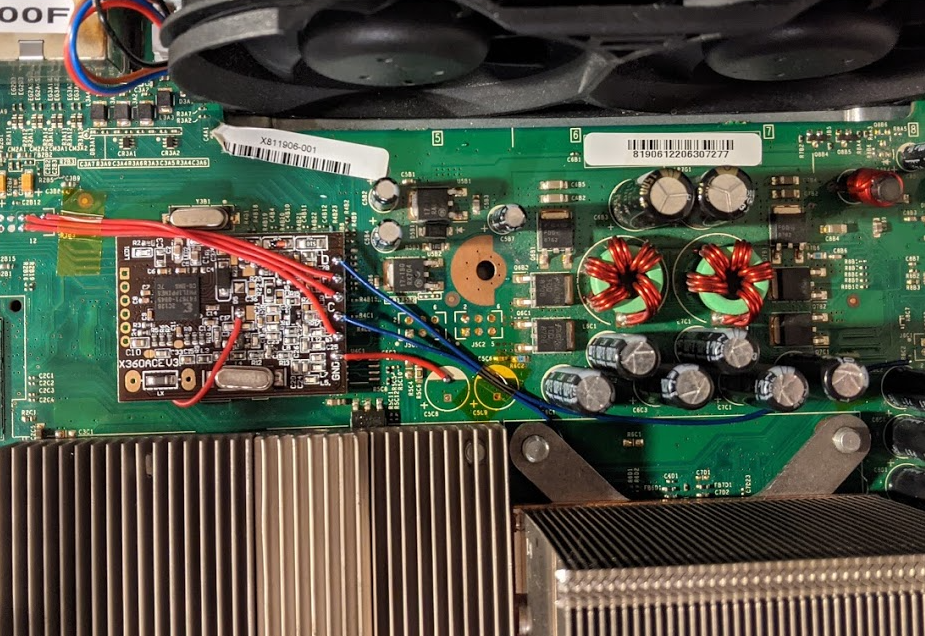
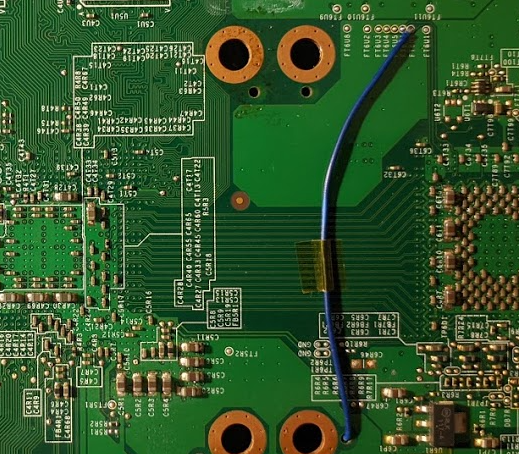
Wire routing recommendations:
Chip placement, 1.8V point, GND to A/V port:
Solder wire from 1.8V on board to 1.8V point on ACE: Remove the diode. Failing to do so will cause damage to your CPU