Tools:
- A basic toolkit which includes torx bits
- A device to read the consoles nand (xFlasher, NAND-X, JR-Programmer, MTX Flasher, Raspberry Pi Pico)
- Some 28-30awg single core wrapping wire (sometimes known as Kynar wire)
- A soldering iron and some soldering experience as you’ll be working with tiny points.
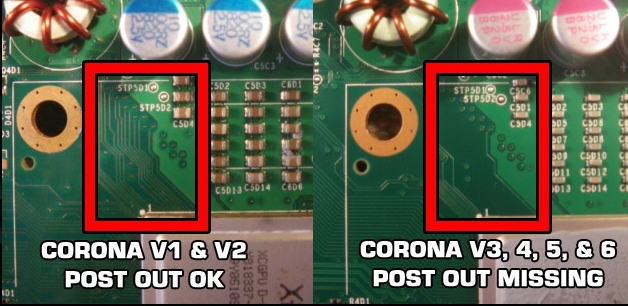
NOTE: Corona V3/V4/V5/V6 motherboards will need a Post Fix Adapter, if you are unsure please follow this diagram:
Resistors and diodes:
- All Phats: 1x 1n4148 (or similar) Diode
- All Phats: 1x 22k Resistor: (Red, Red, Orange, Yellow)
- Trinity: 1x 3k-10k Resistor: (Brown, Black, Orange, Gold)
- Corona: 1x 1k Resistor: (Brown, Black, Red, Gold)
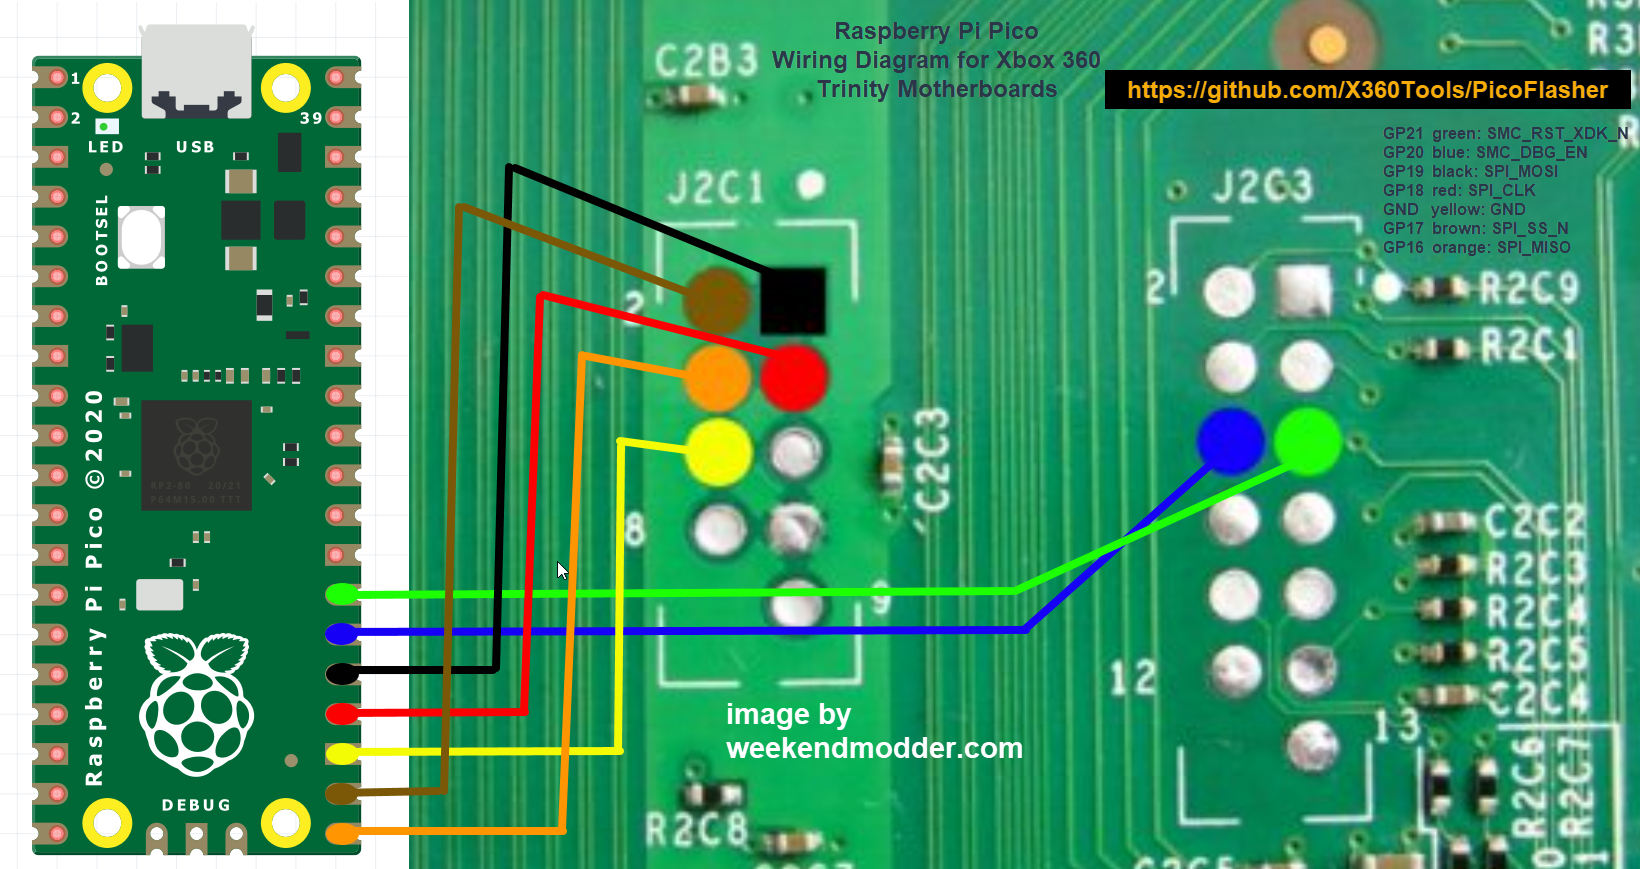
Raspberry Pi Pico:
If you want to use the Raspberry Pi Pico – make sure you are using the latest version of Octal450’s J-Runner with Extras.
You will also need to flash your Raspberry Pi Pico with the latest version of PicoFlasher which can be found here: https://github.com/X360Tools/PicoFlasher/releases/
Flashing your Pico with UF2 file:
- Simply hold the BOOTSEL button down on your Pico and plug into your computer, it should show up as removable storage.
- Click and drag the UF2 file to the Pico in your file explorer. The device should automatically unmount on completion.
- Now, load up J-Runner and you should see PicoFlasher come up as connected device. Once you see this, follow through with steps below!
JR-P / NAND-X / xFlasher 360
PicoFlasher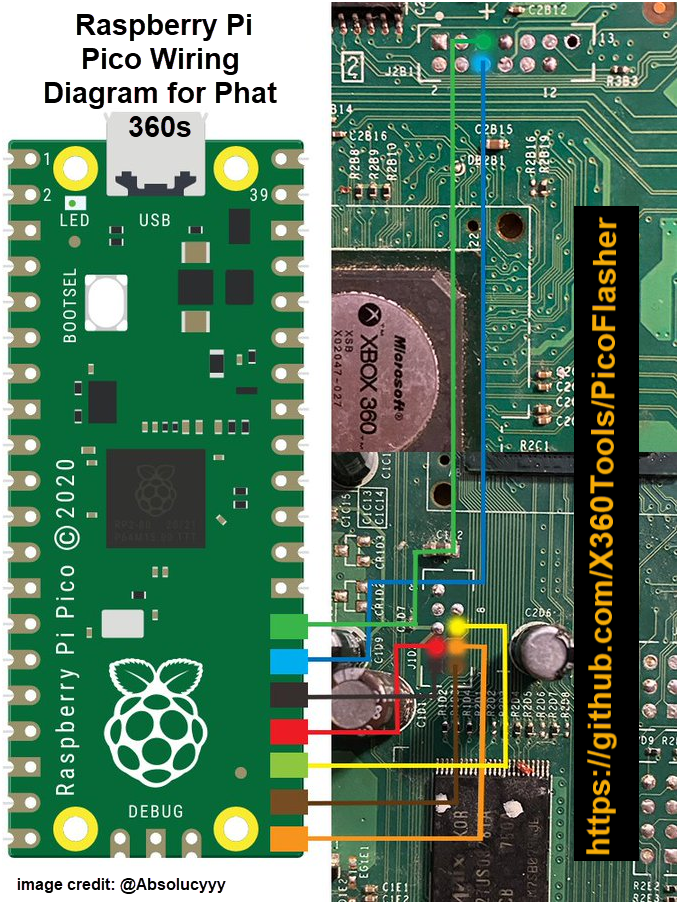
JR-P / NAND-X / xFlasher 360
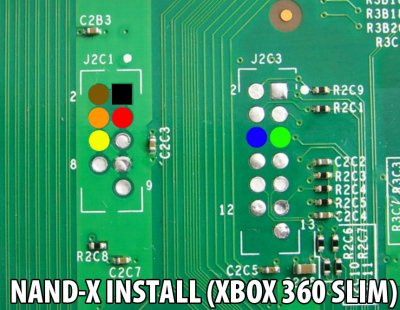
PicoFlasher
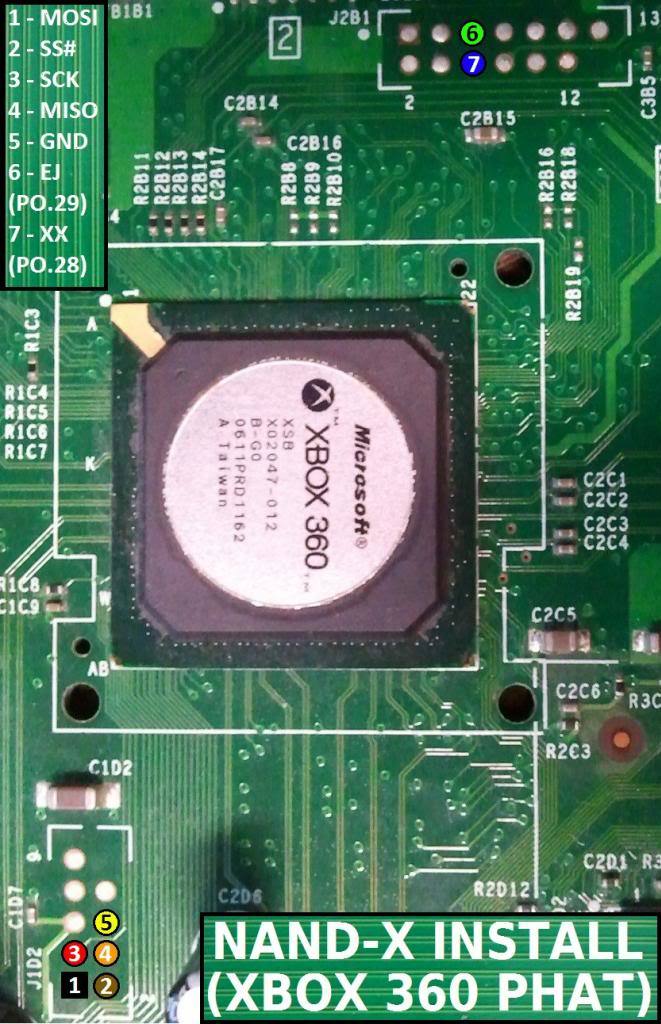
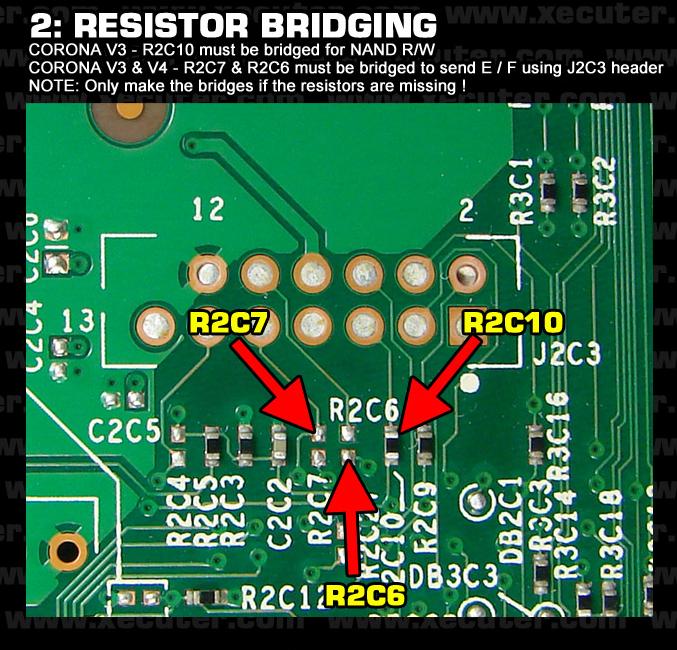
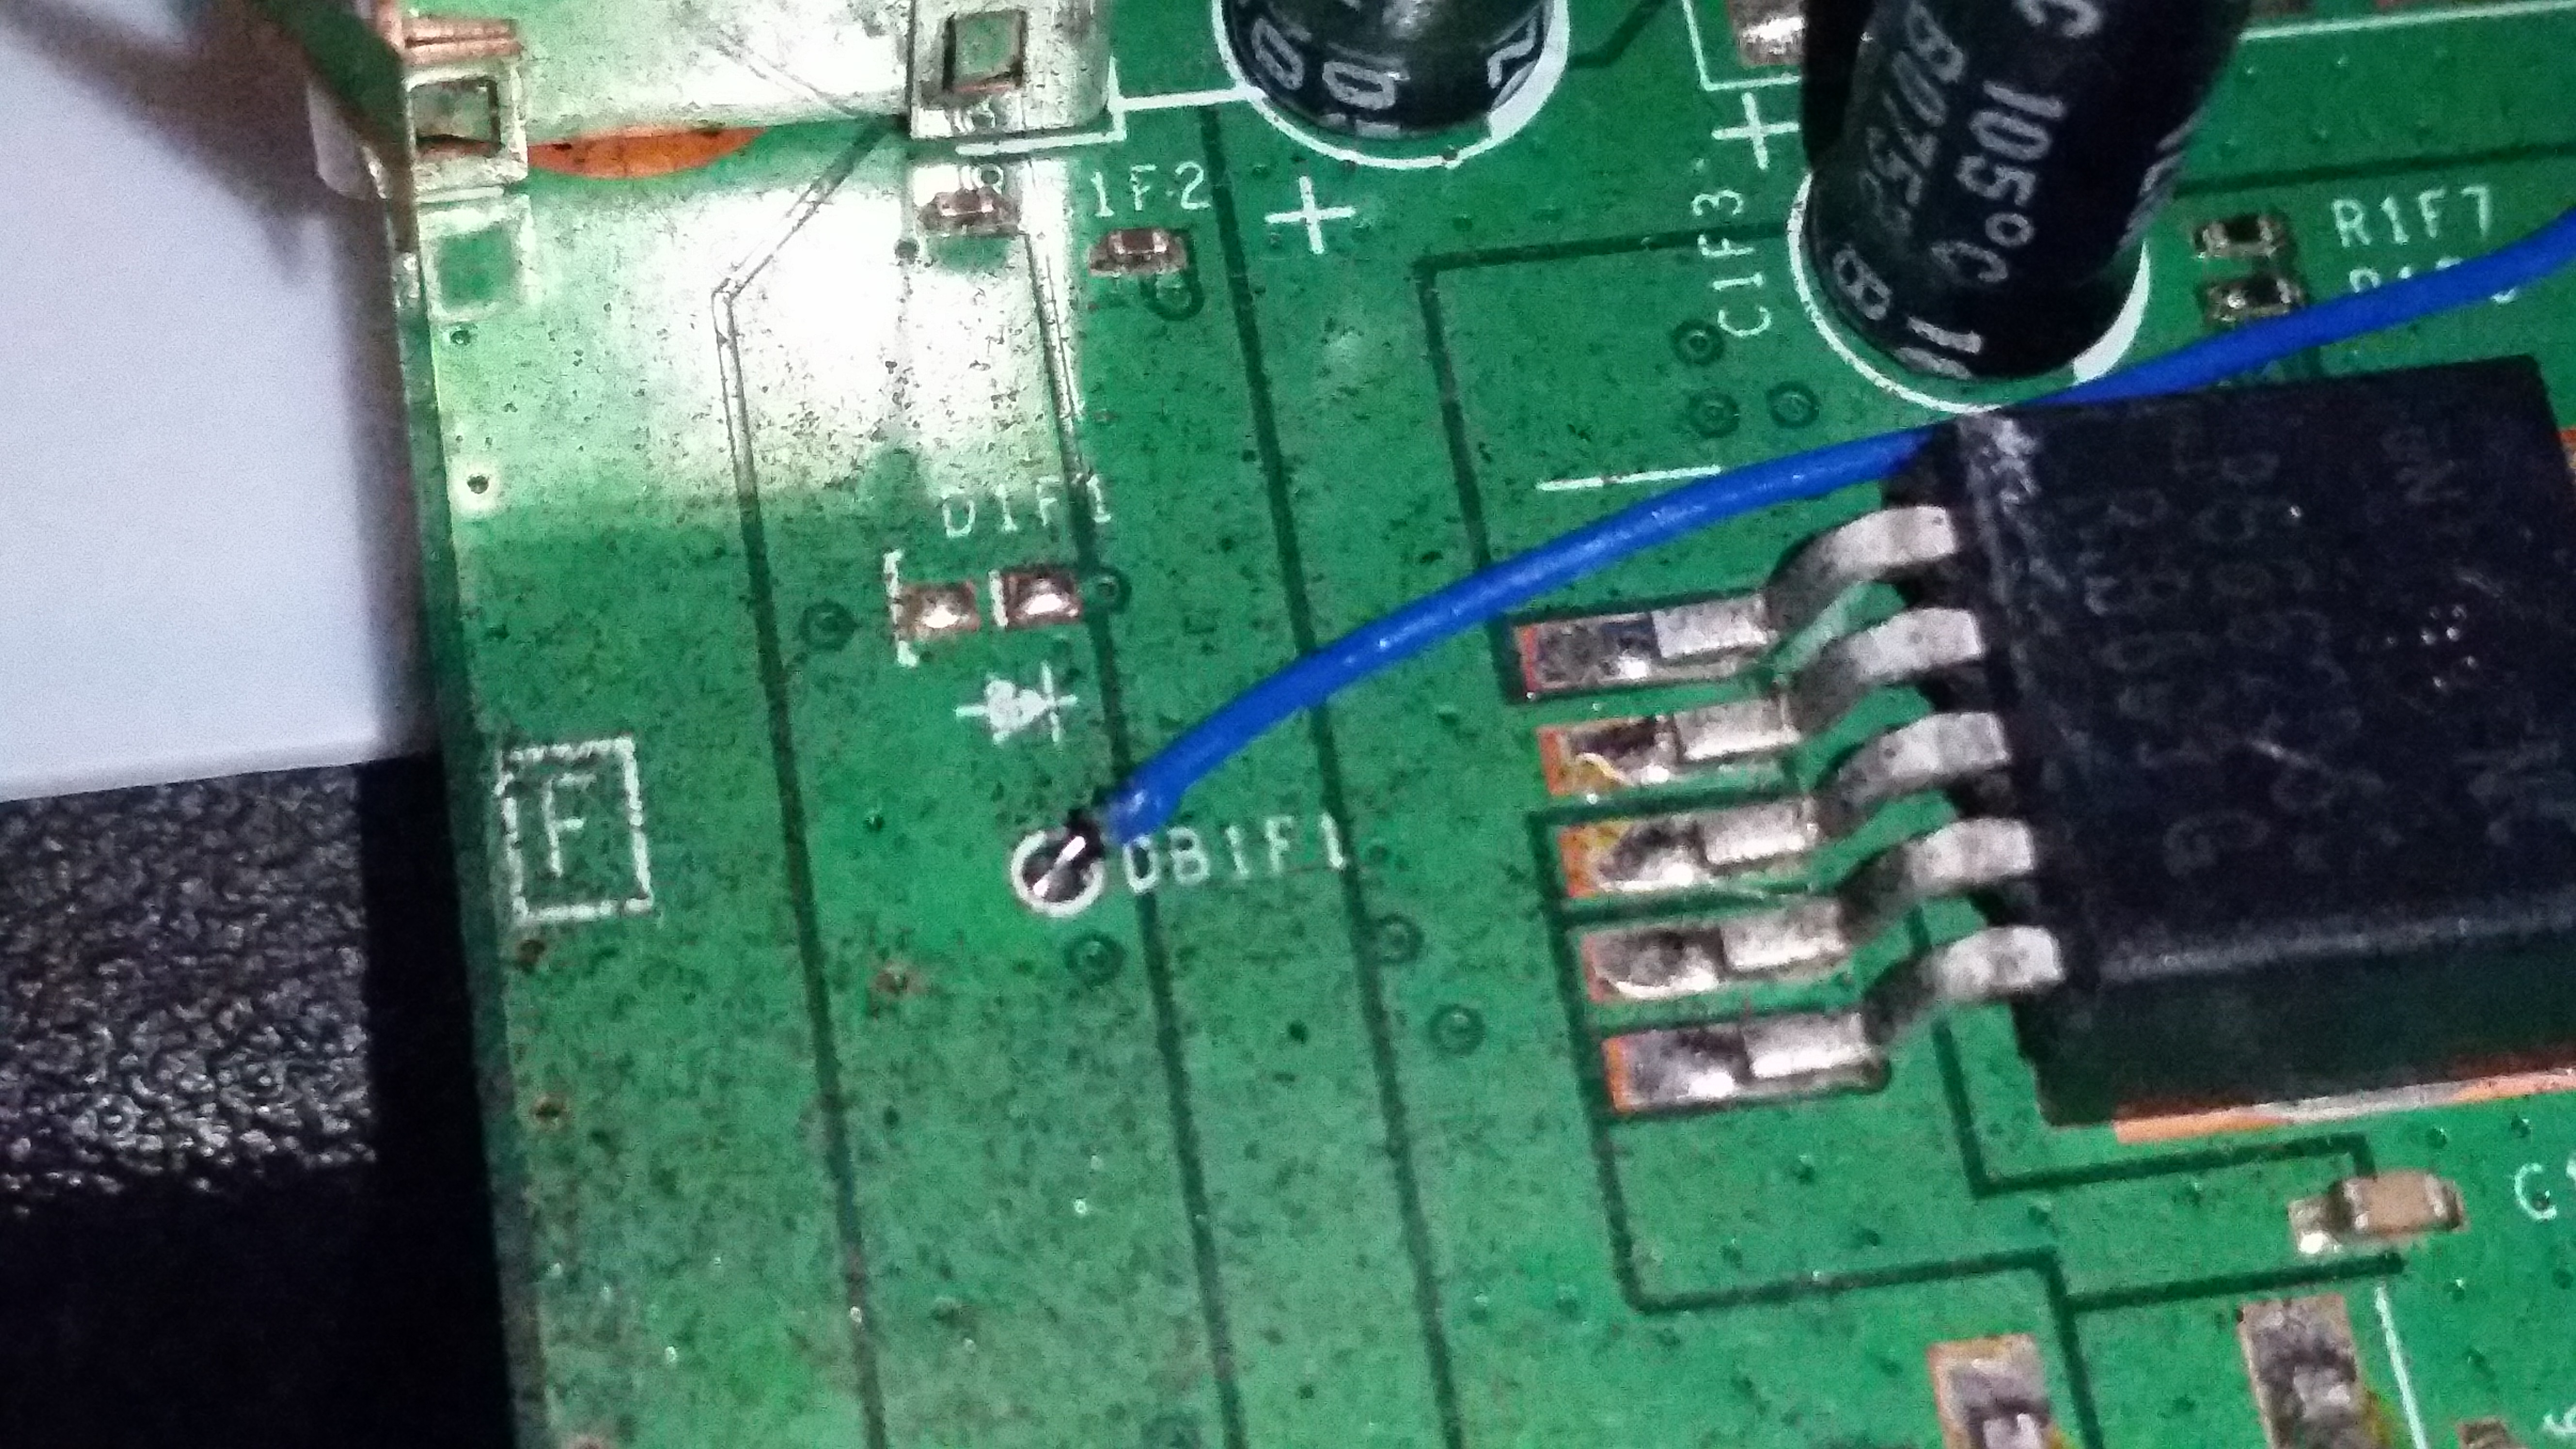
NOTE: Check these points on your board otherwise you wont be able to read/write your NAND!
Normal Consoles
JR-P / NAND-X / xFlasher 360
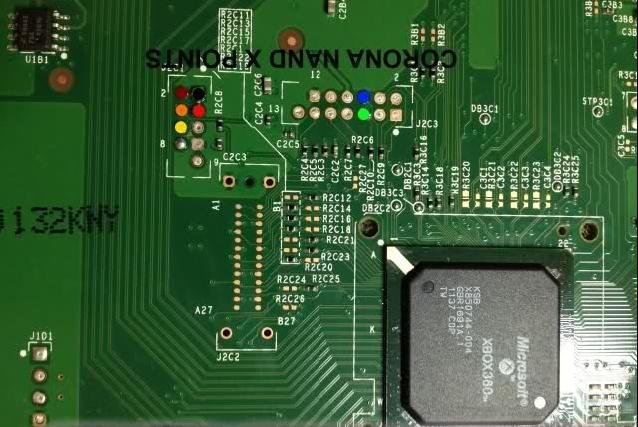
PicoFlasher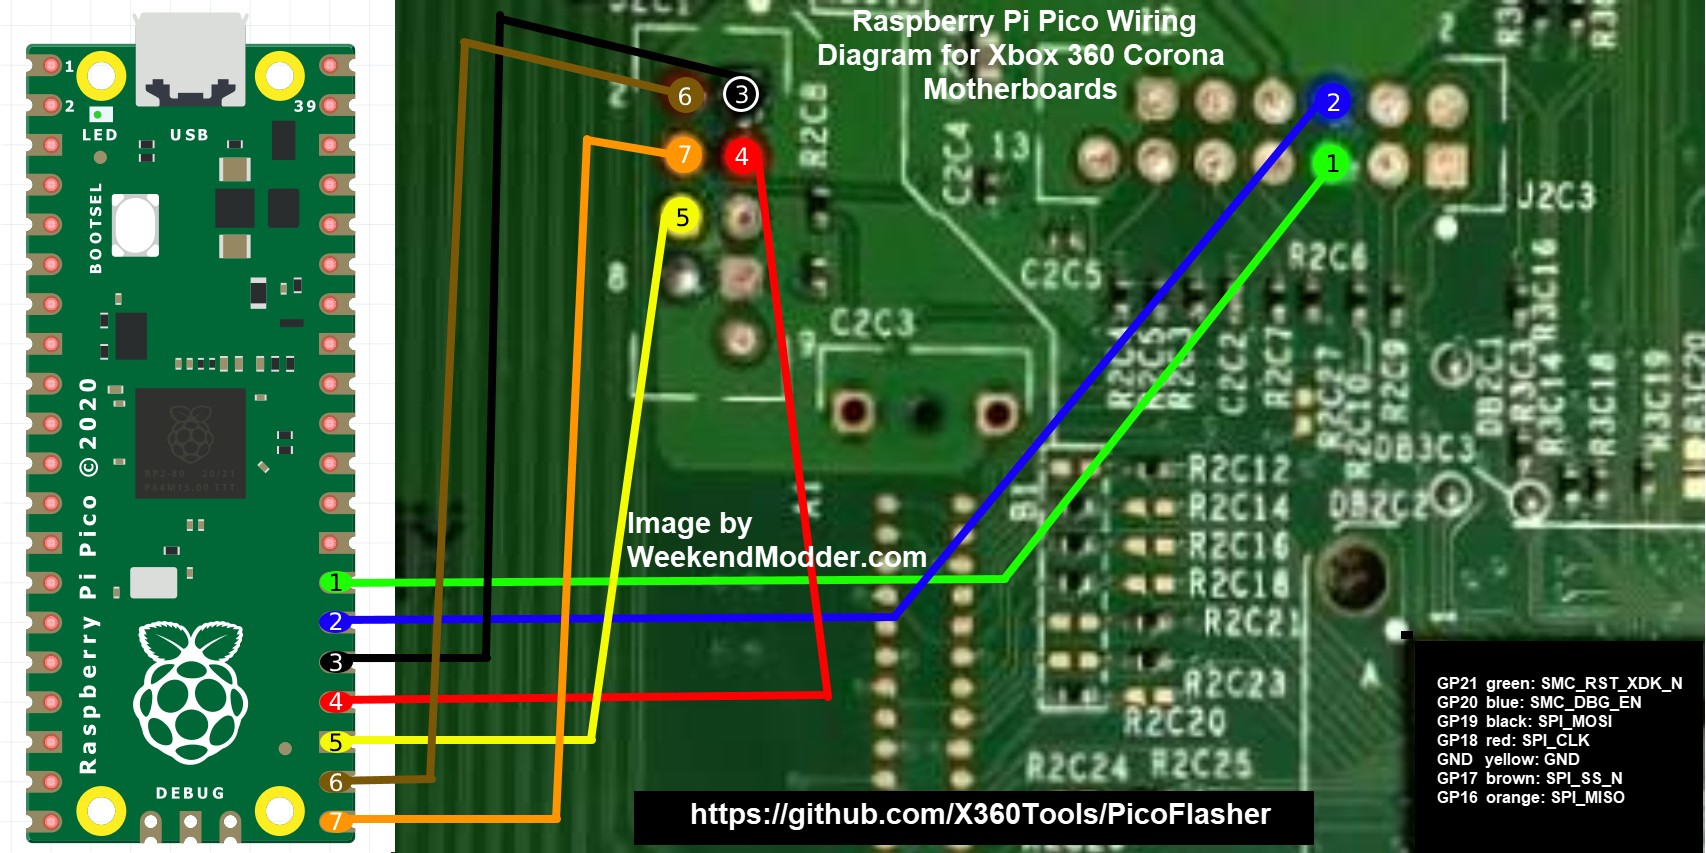
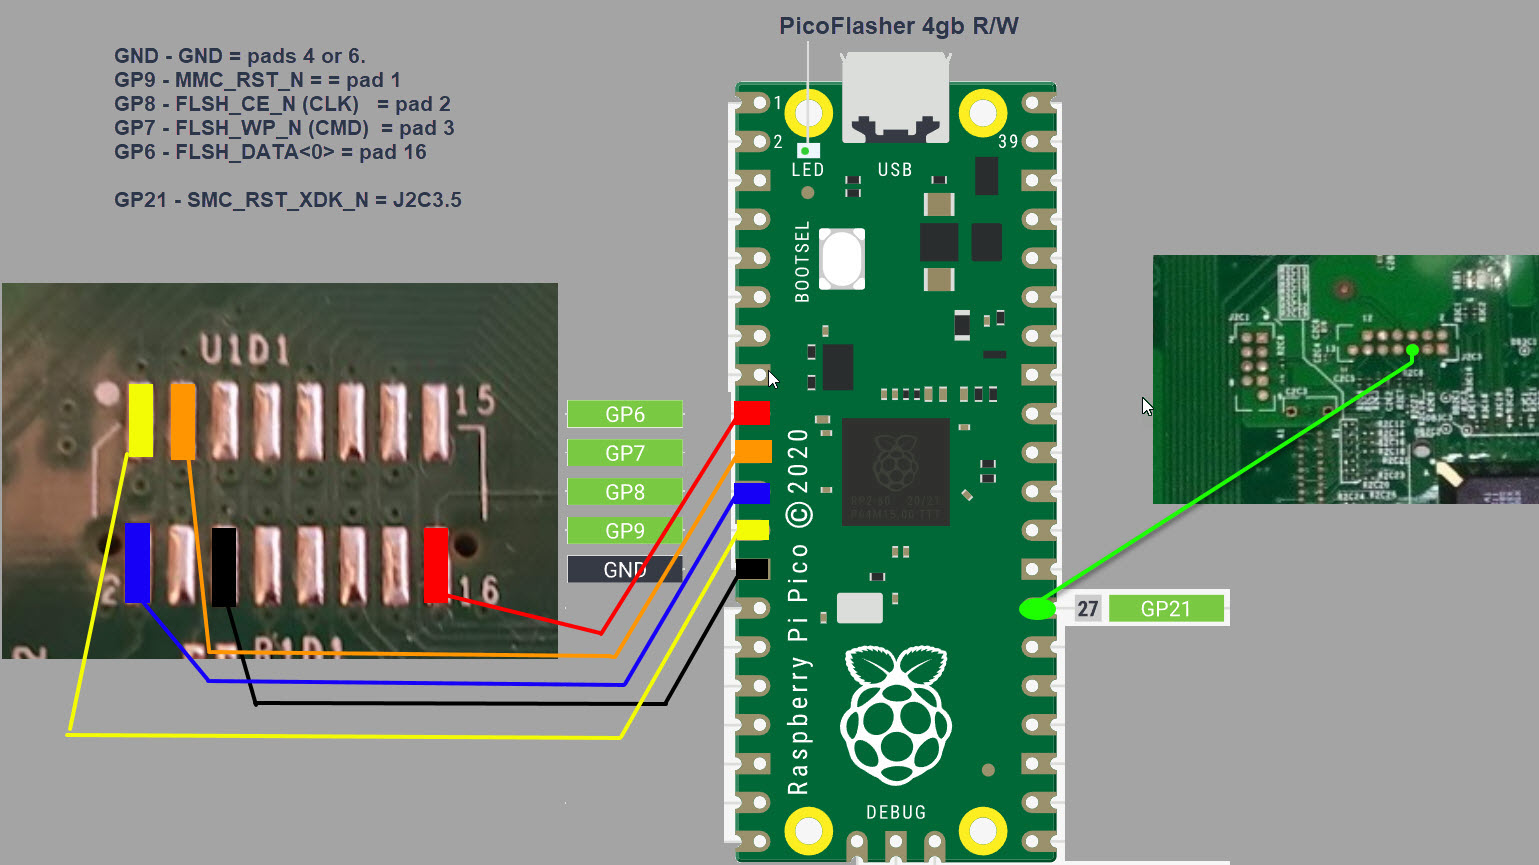
4GB Consoles only!
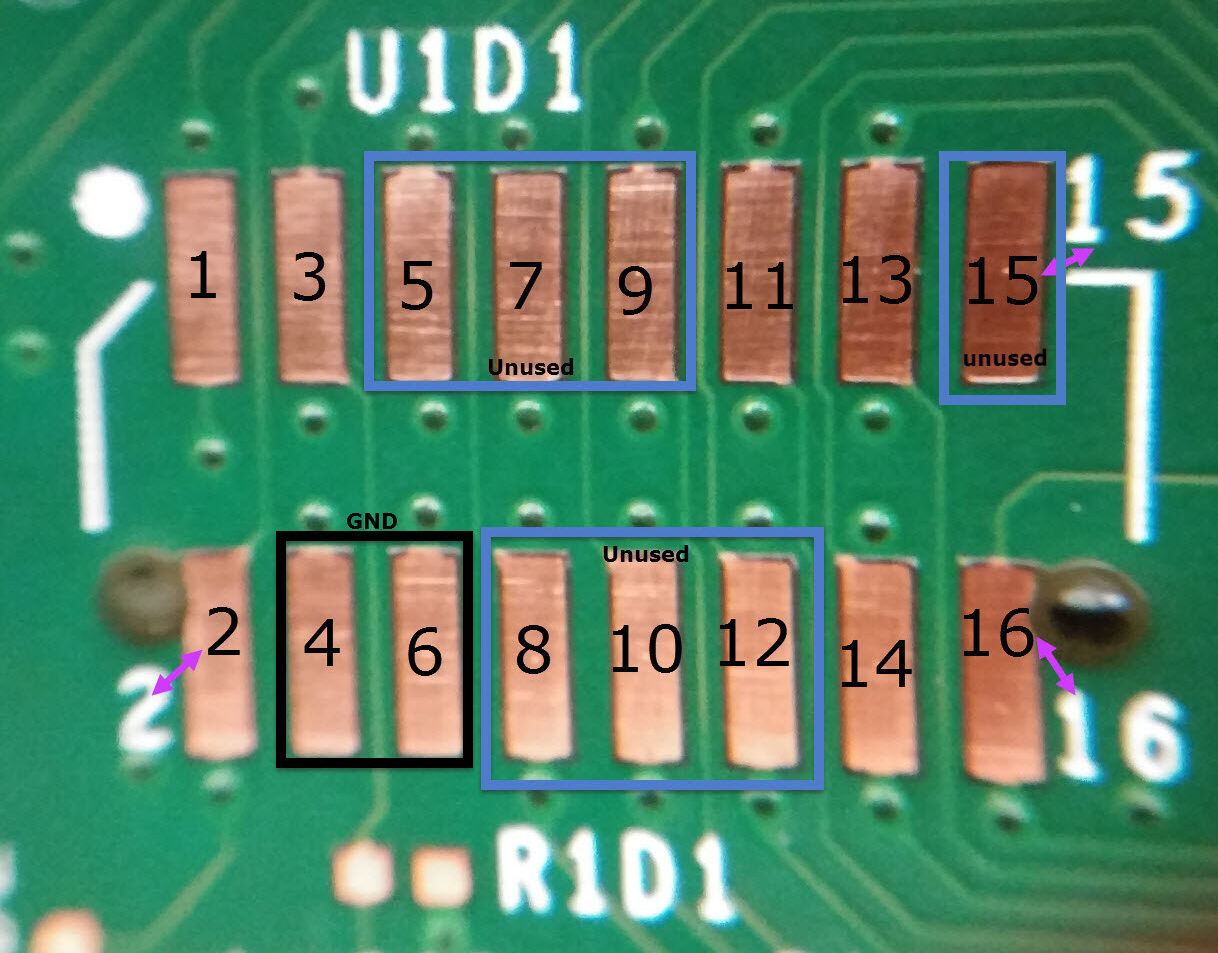
PicoFlasher
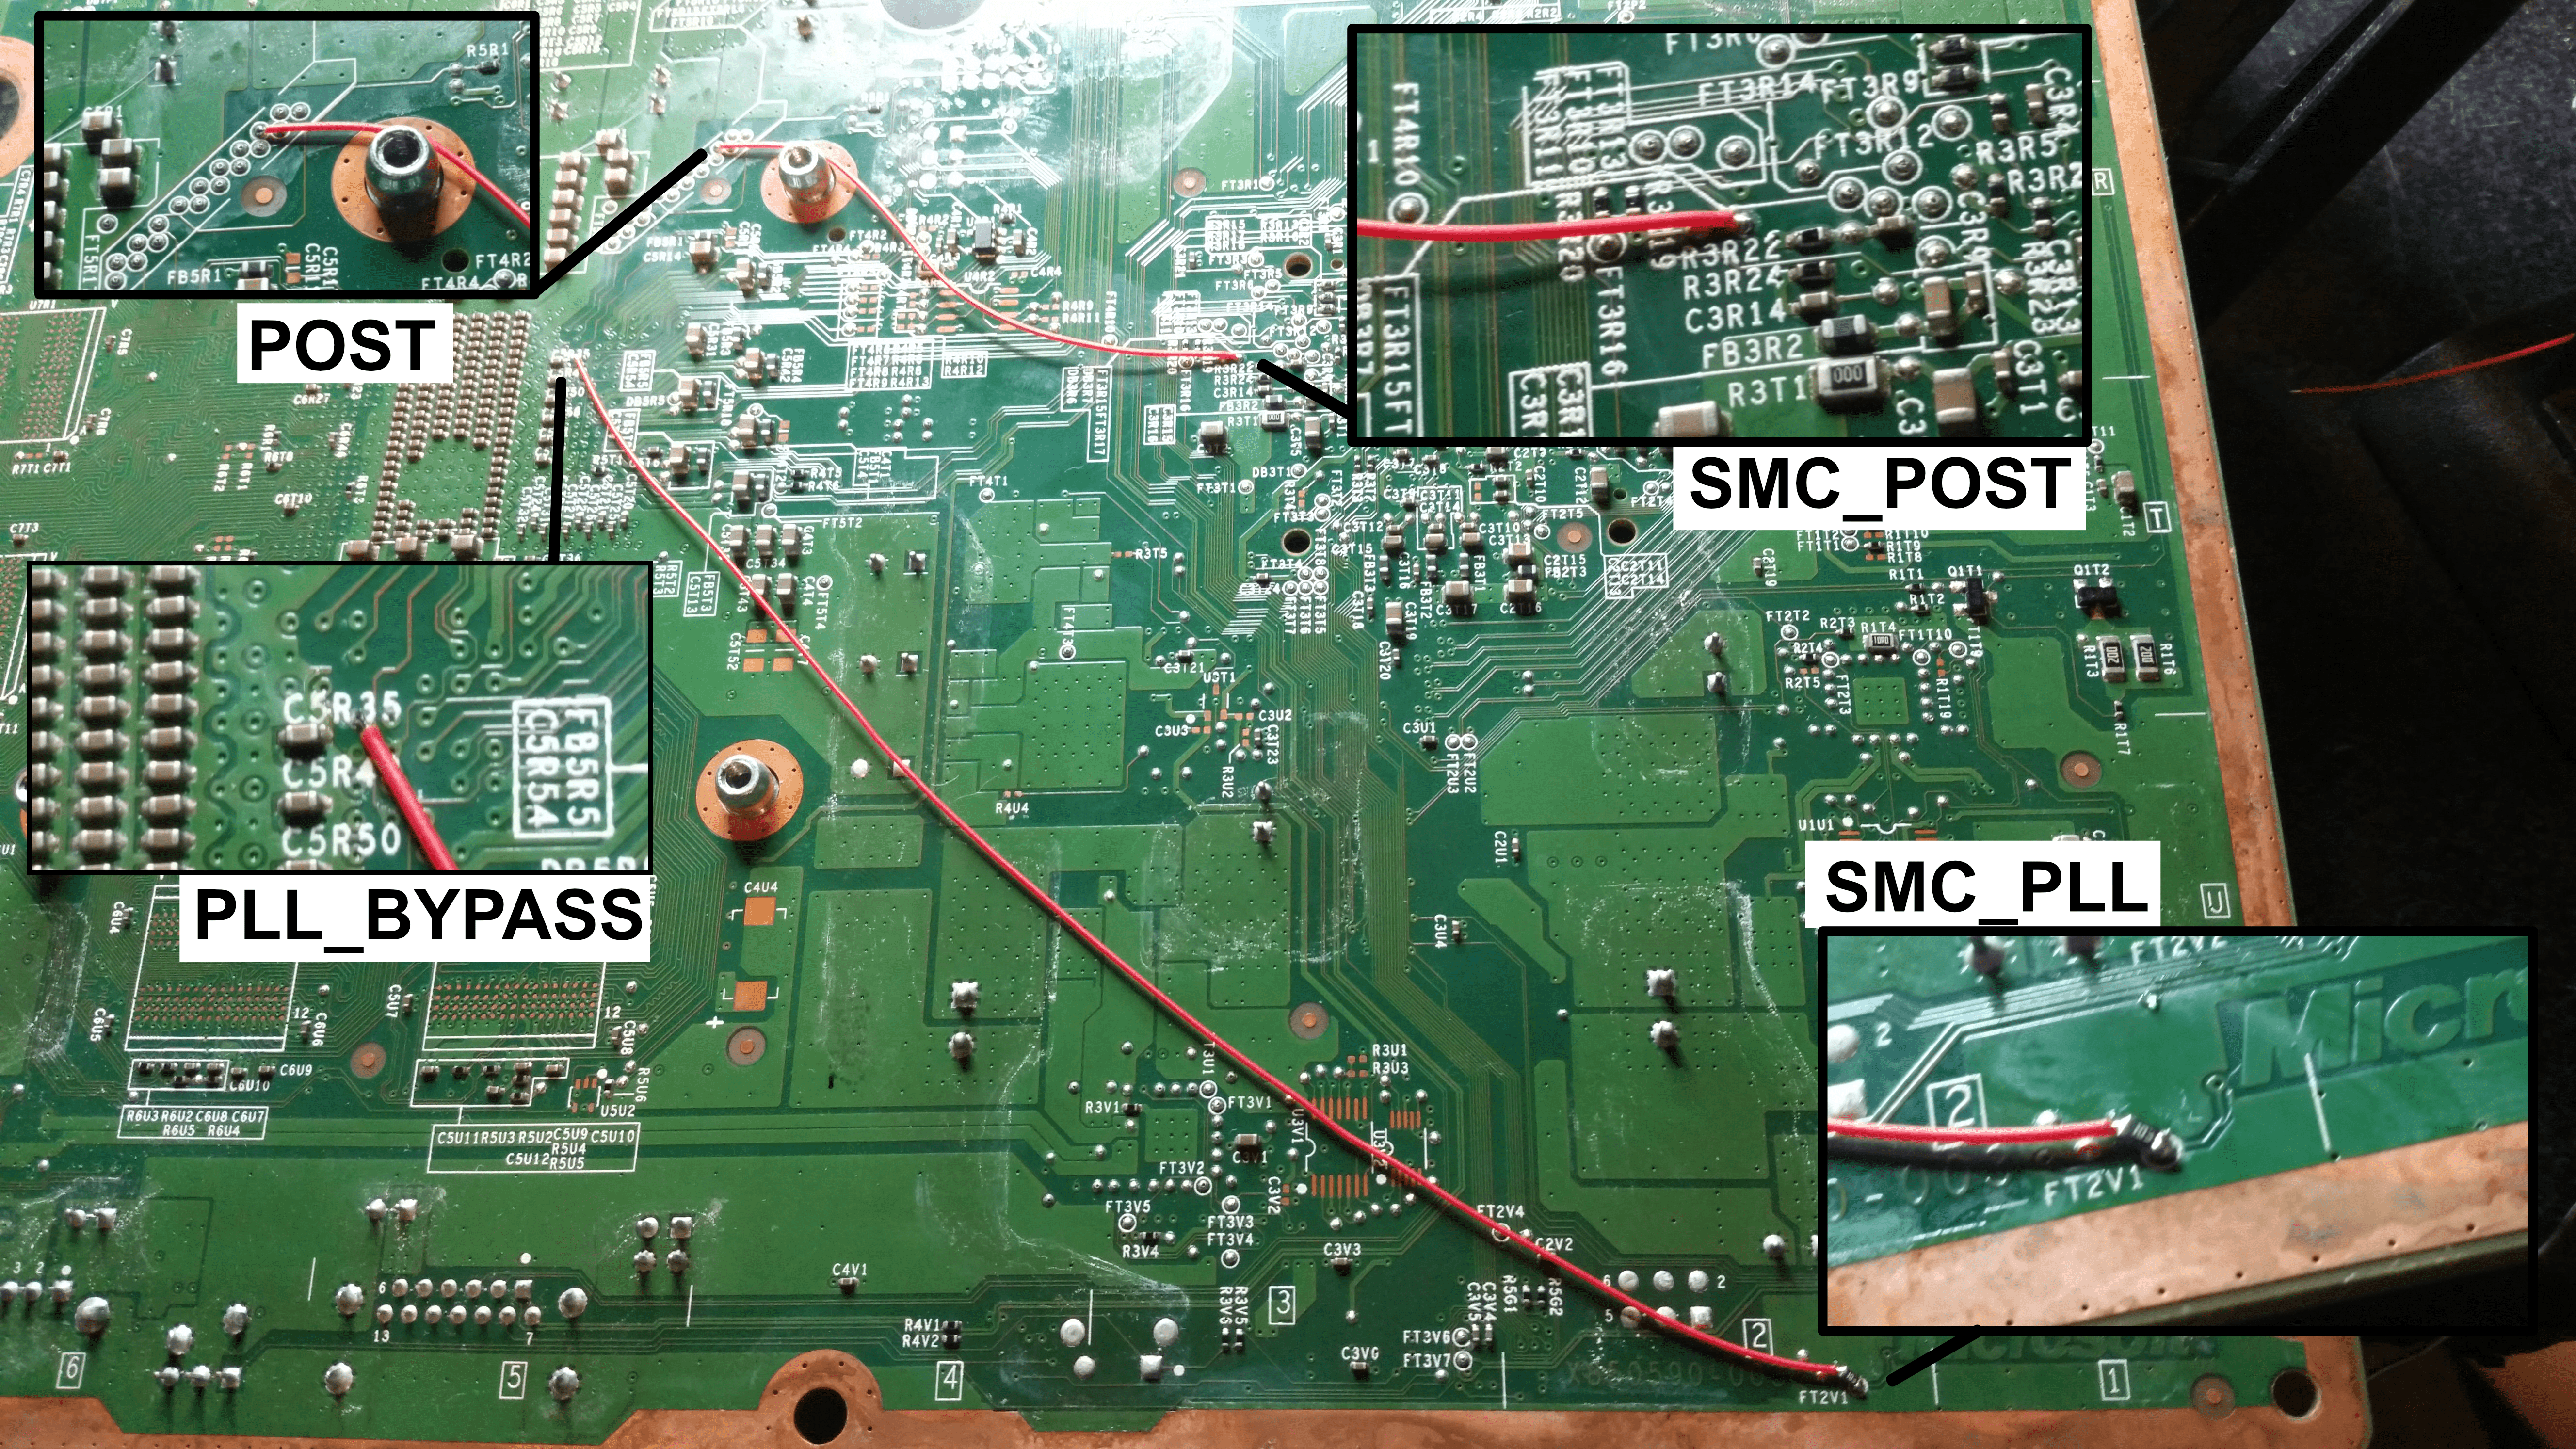
Place a 22k resistor on the PLL point and solder your wire to the other side of the resistor.
Place a 1n4148 diode with the cathode end (black banded end) on POST and solder your wire to the other side of the Diode.
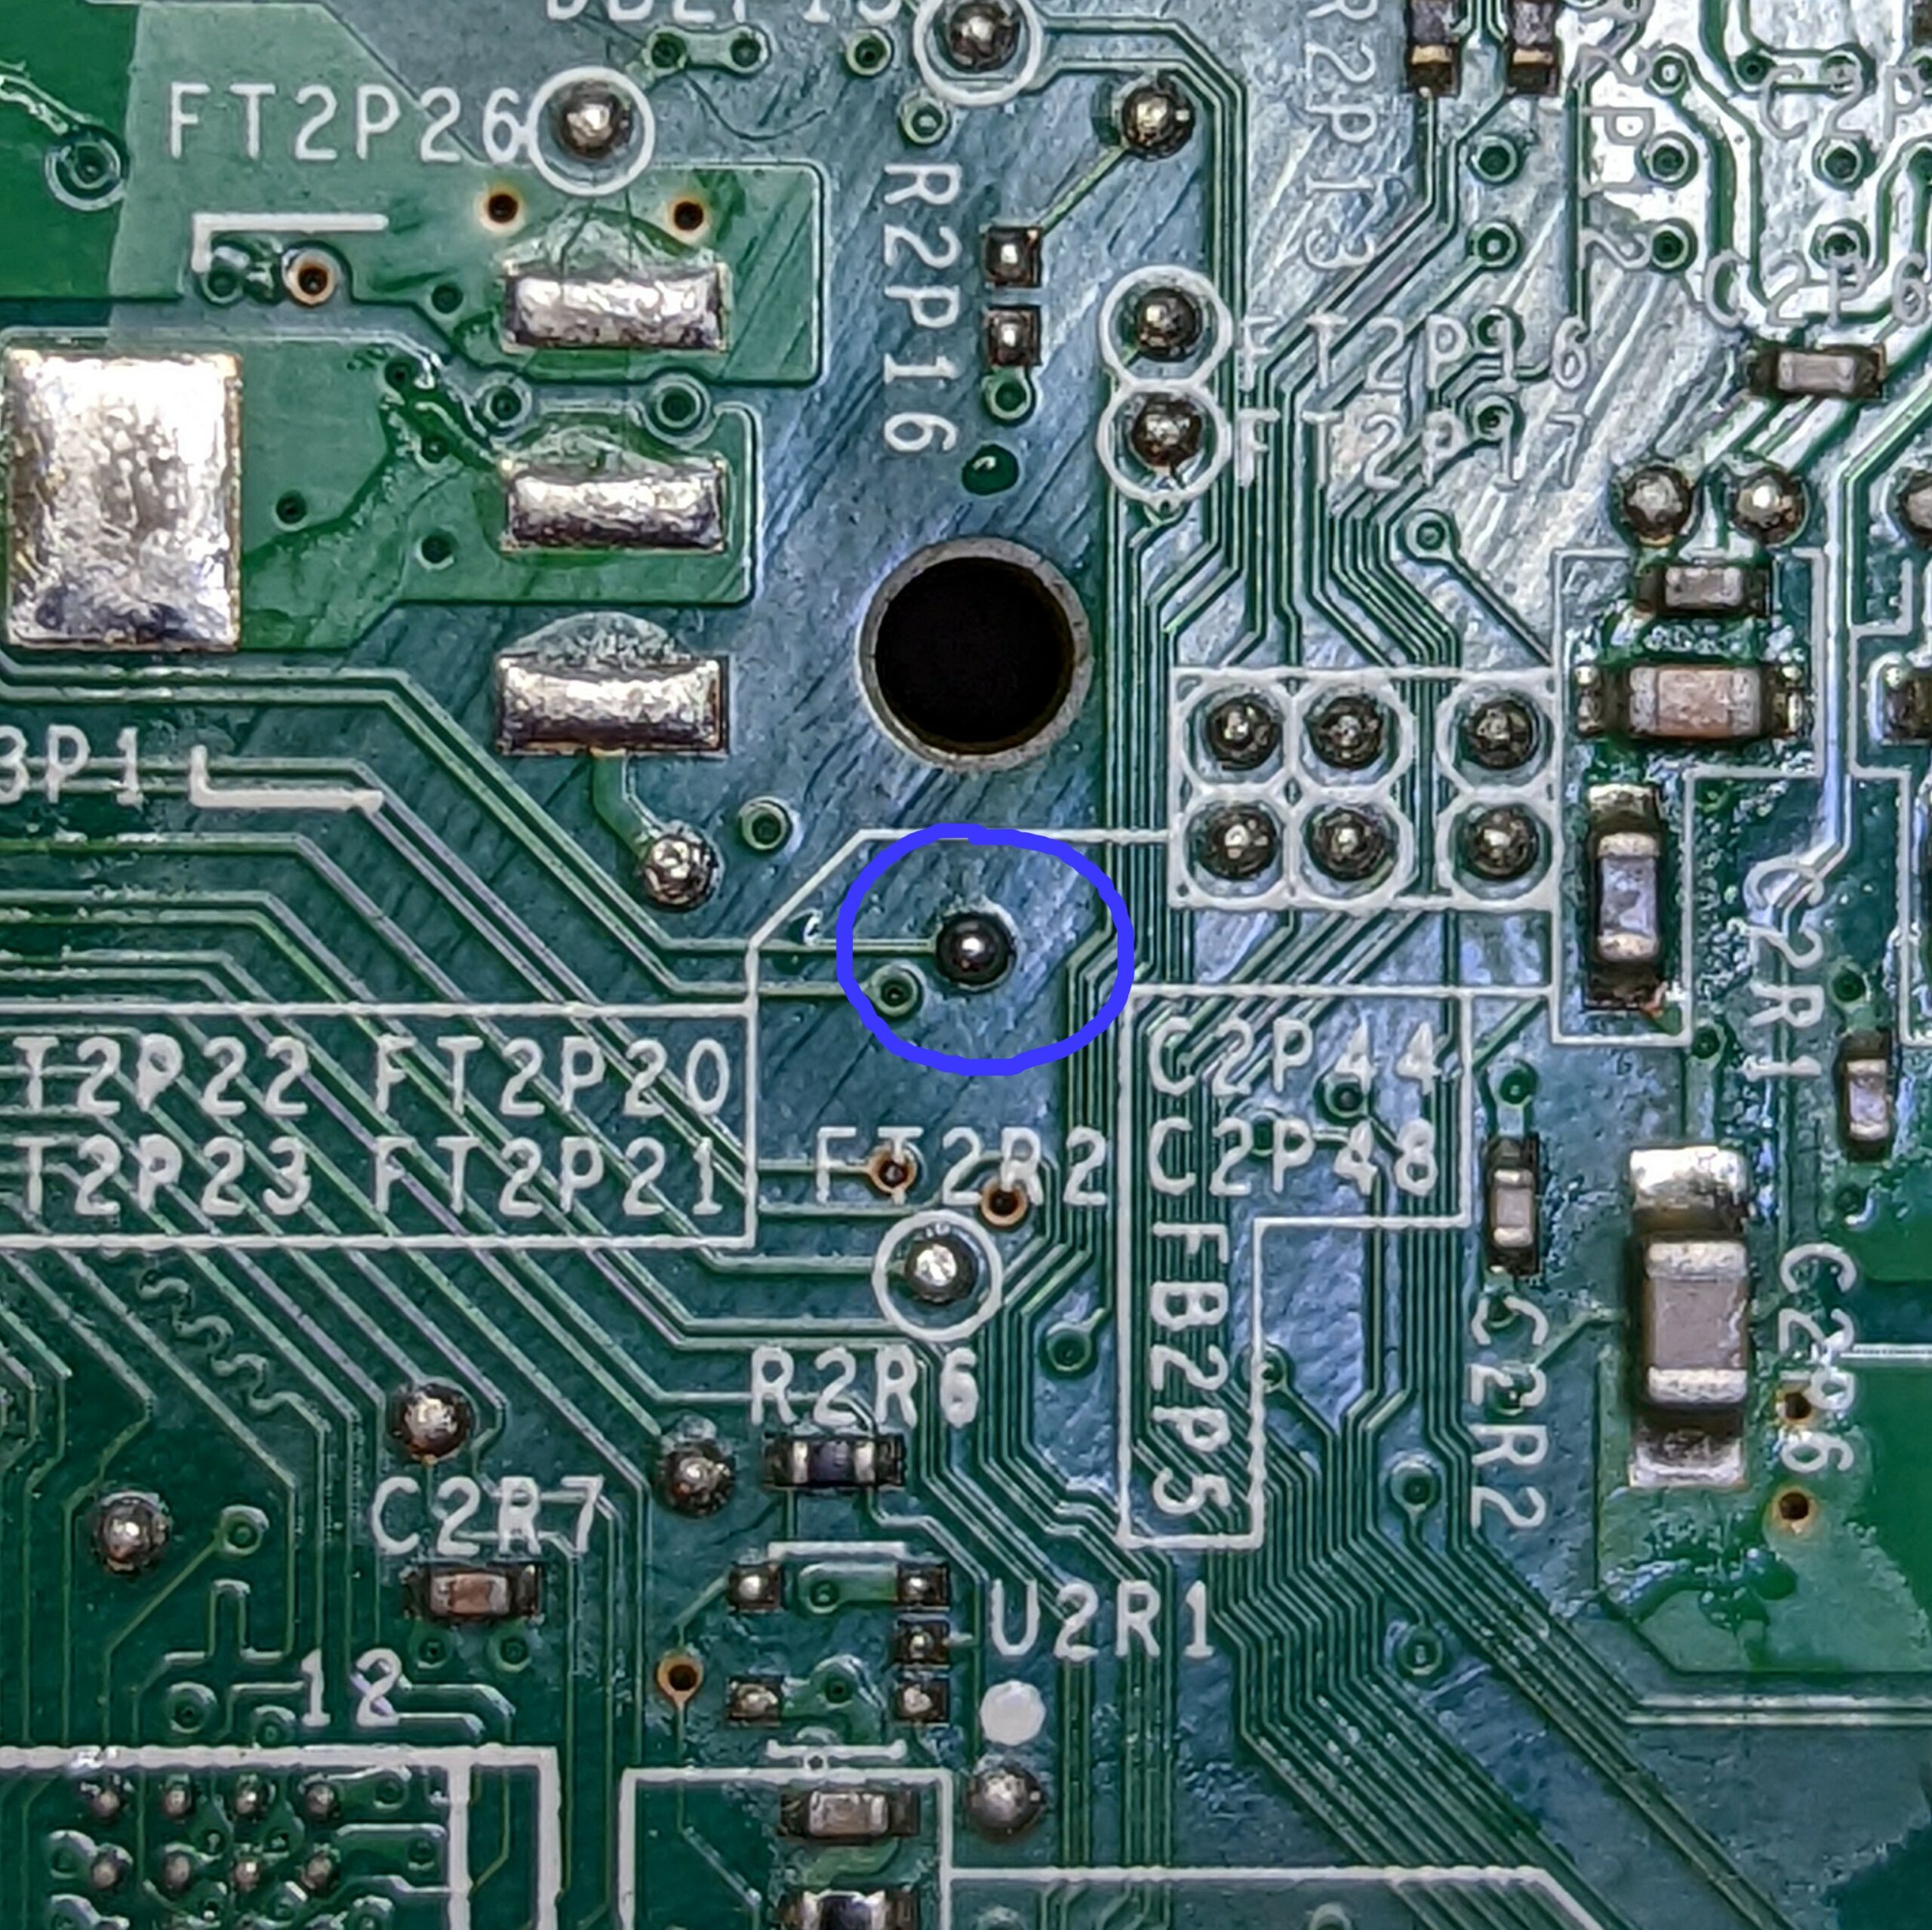
Bottomside Points
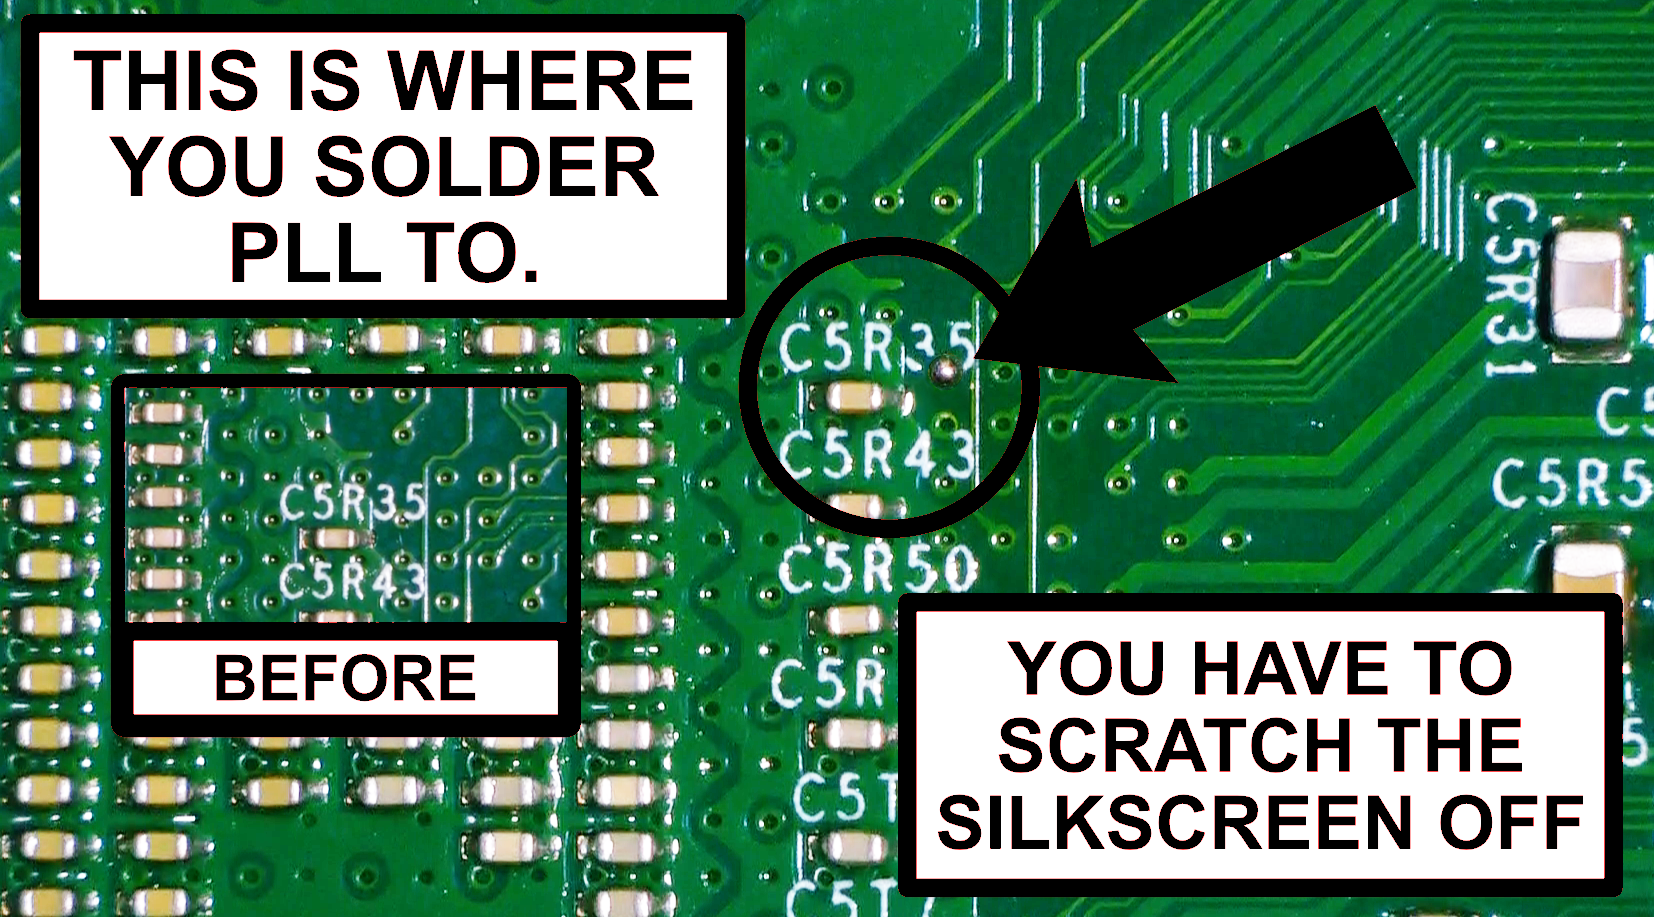
Topside PLL Point
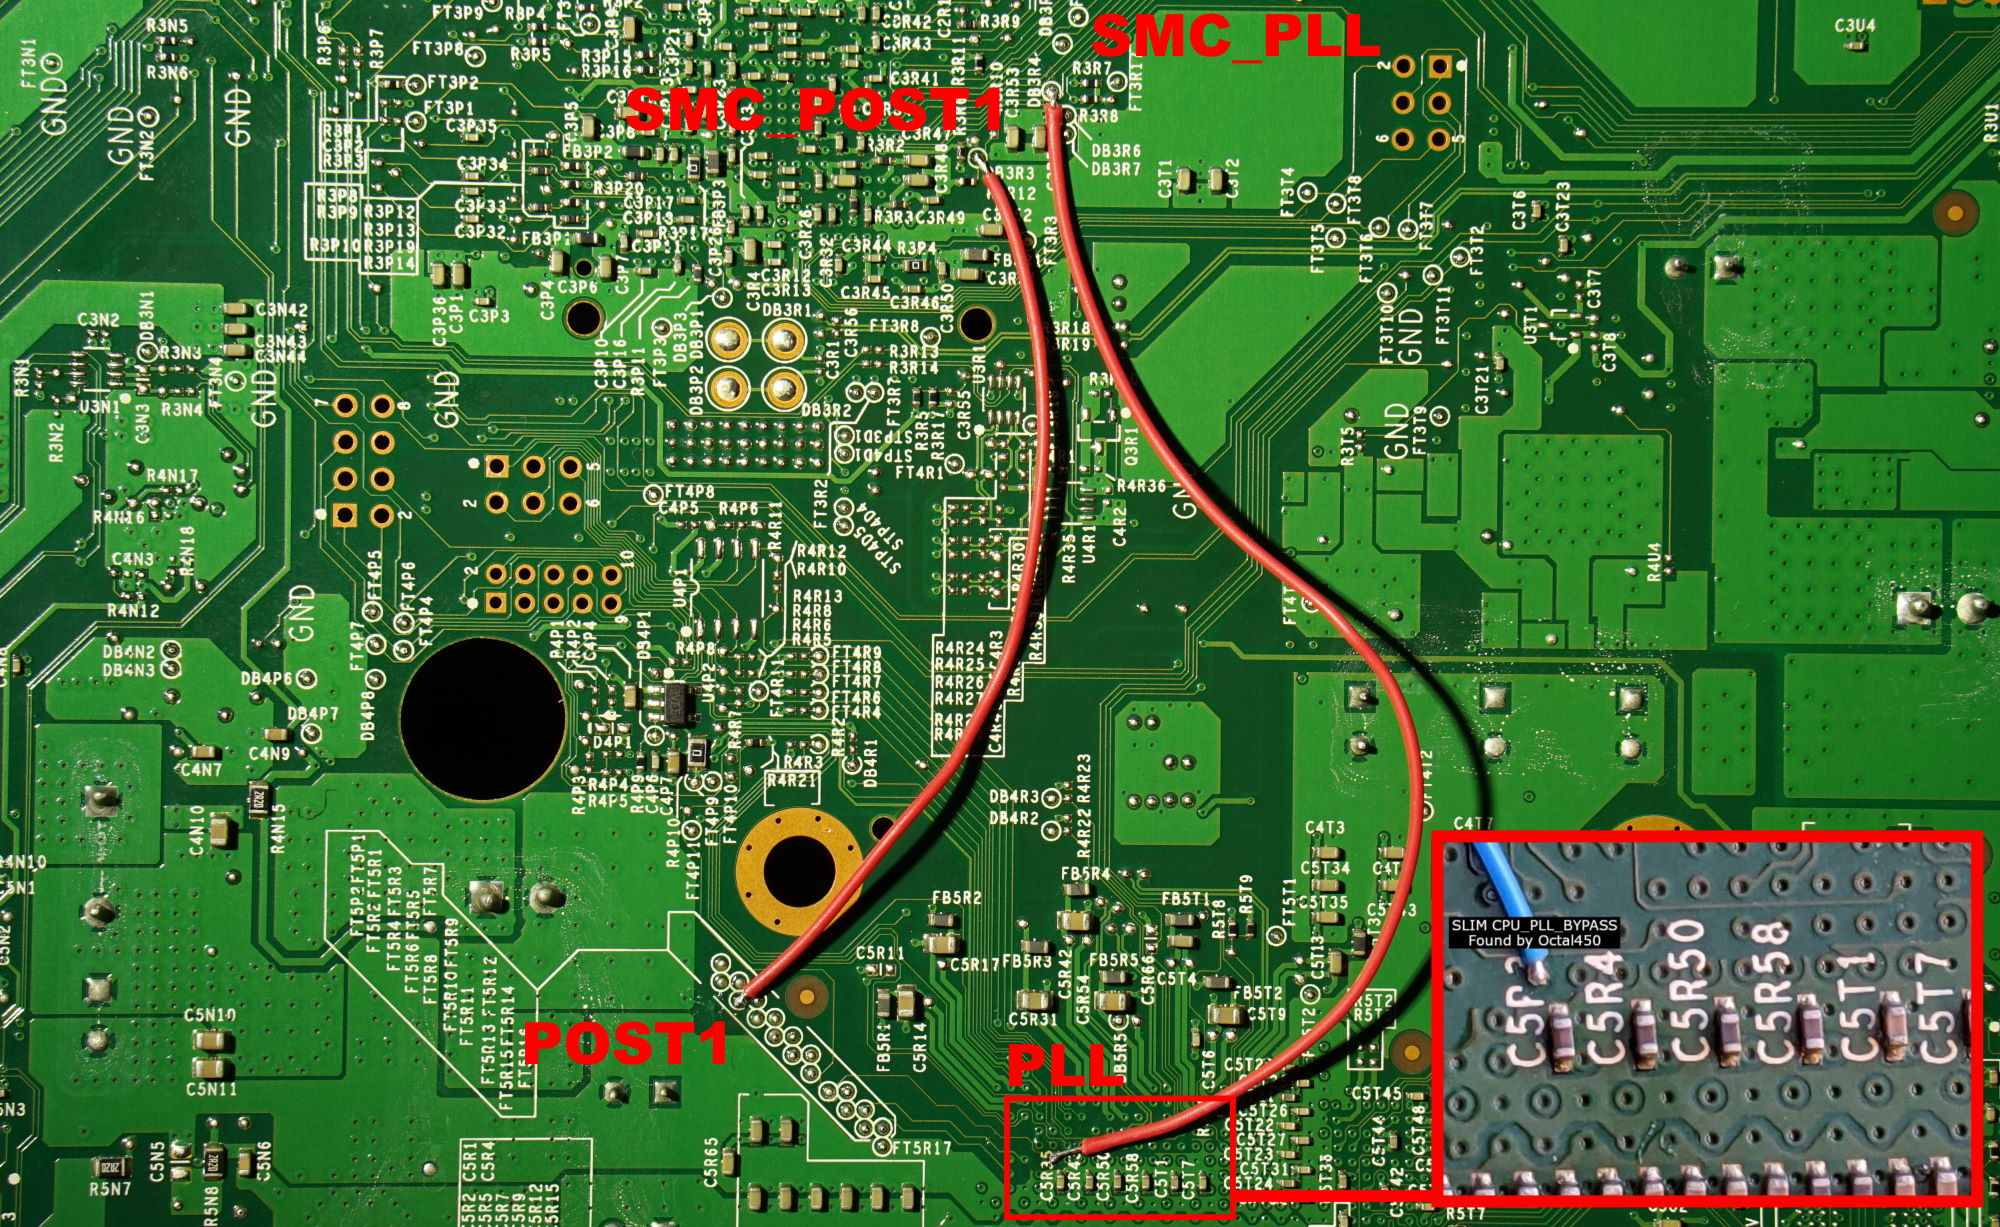
Bottom Alt PLL Point
Place a 3k-10k resistor on PLL and solder your wire to the other side of the resistor.
NOTE: If you are performing this mod on a Corona V3/V4/V5/V6, you will need a postfix adapter. See diagram above!
Place a 1k resistor on PLL and solder your wire to the other side of the resistor
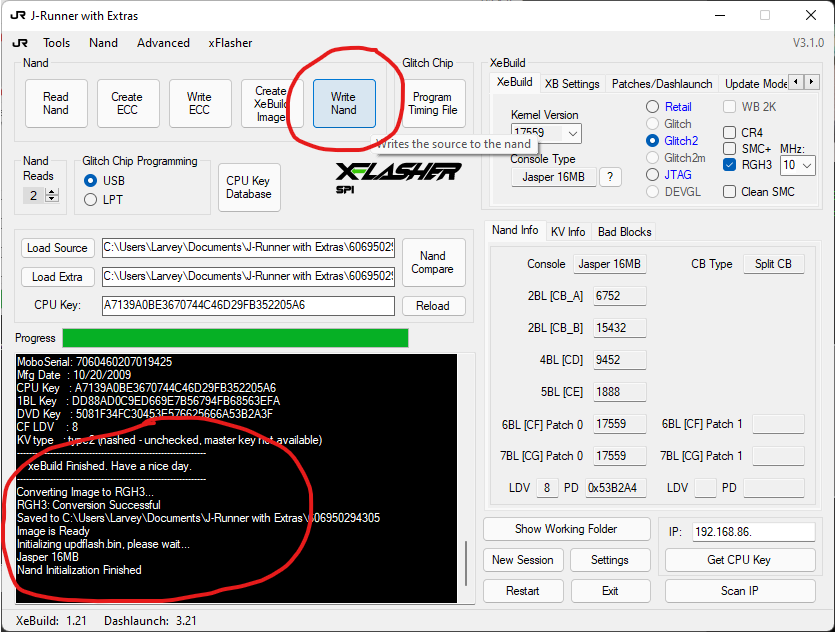
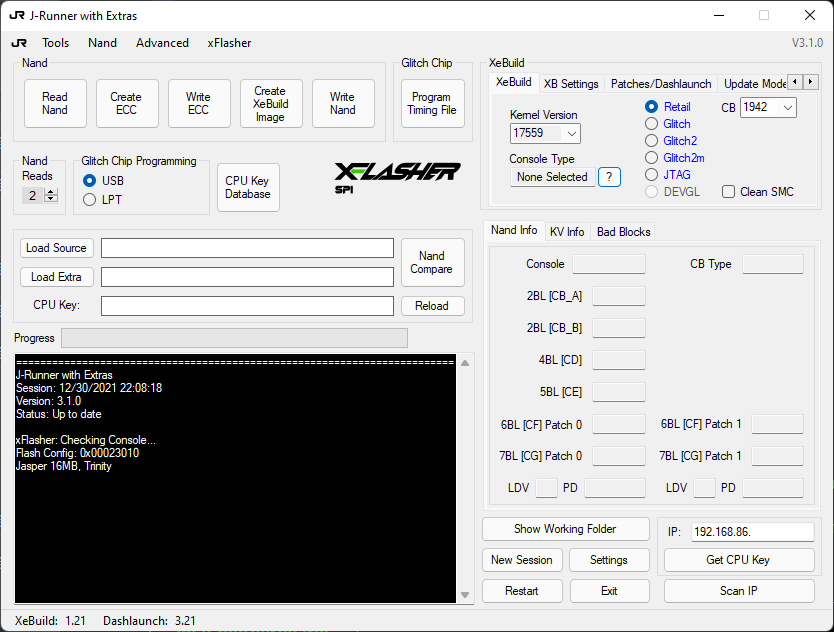
To begin – press the ‘?’ button in J-Runner to make sure your programmer can see your console properly.
If you get an error – check your programmer wires before continuing!
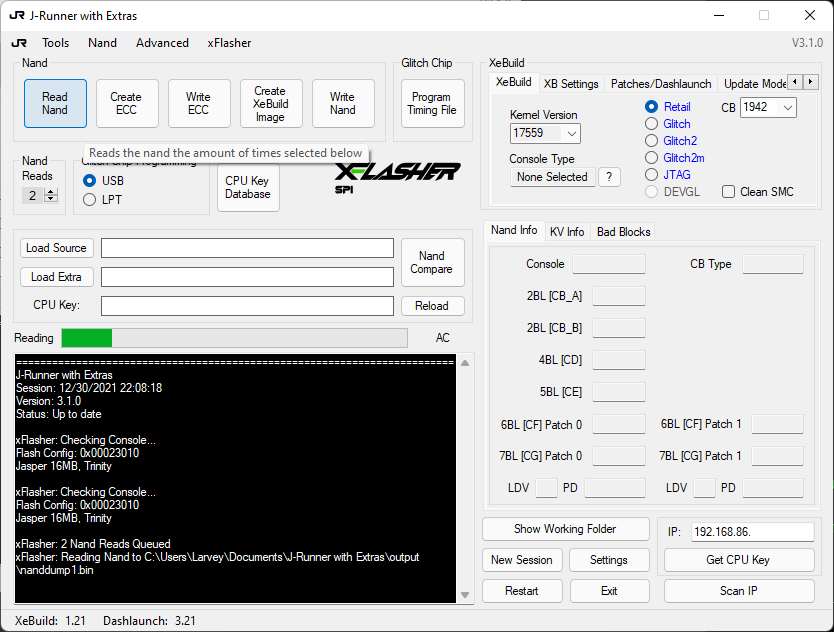
Read your consoles NAND by pressing the ‘Read NAND’ button.
Once NAND has been read, select the following options on the right hand side under XeBuild:
- Glitch2
- RGH3
- 10Mhz (if 10Mhz doesnt work – try 27Mhz)
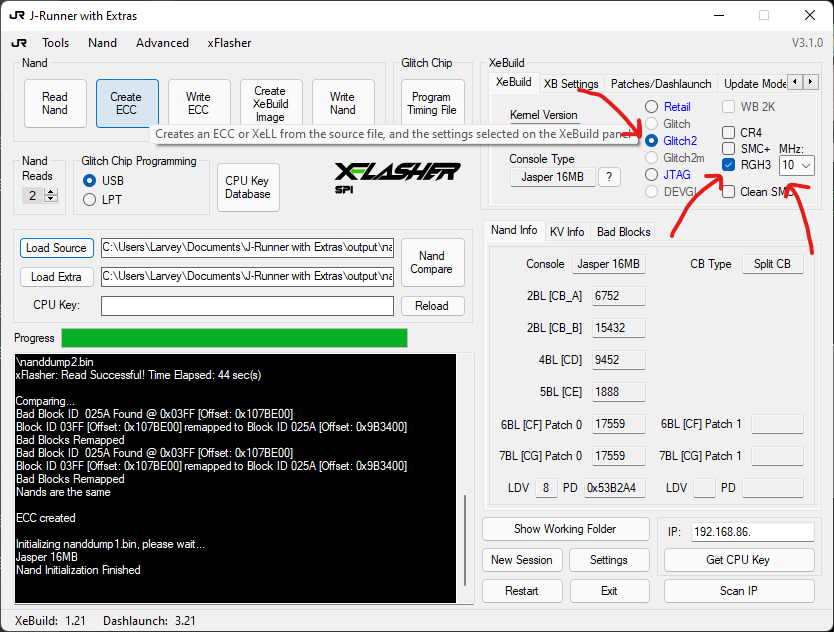
Once XeLL has been created, click ‘Write XeLL’
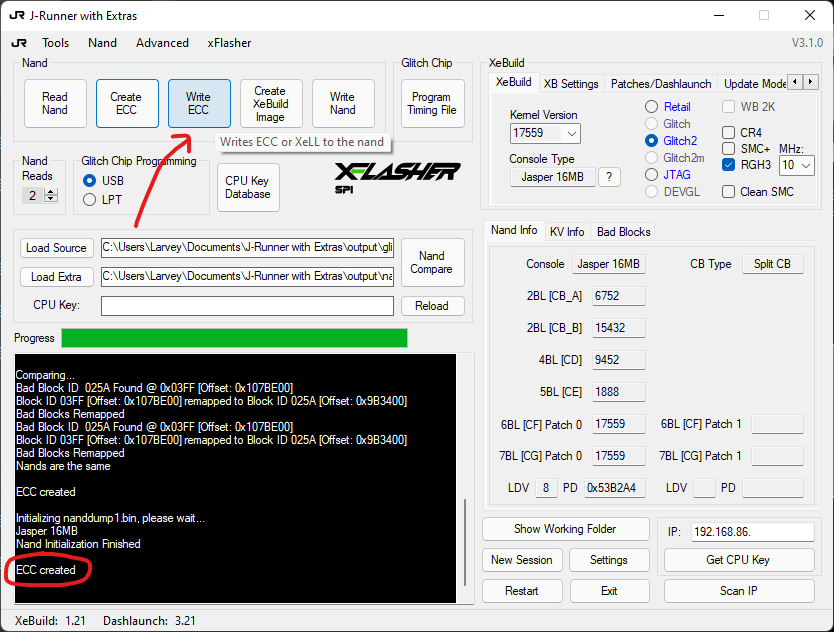
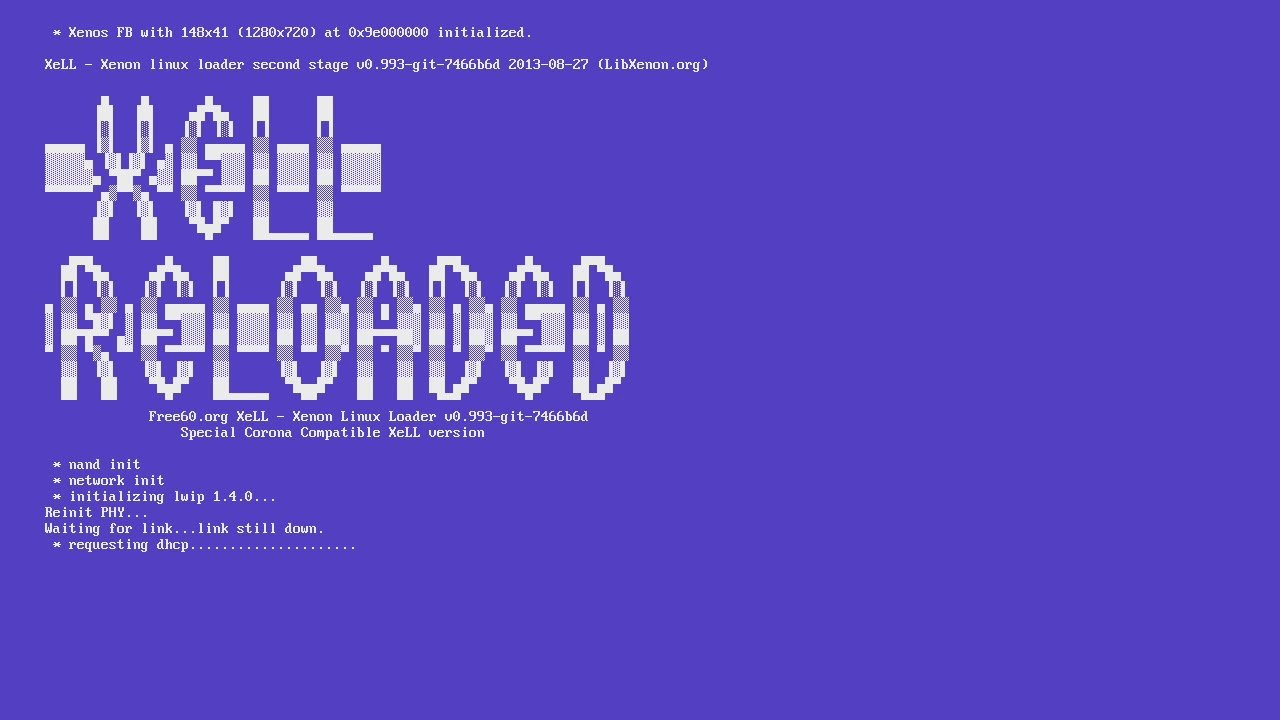
Once ECC has been written to console, unplug your programmer and connect an ethernet cable and HDMI/AV cable. Your console should boot into XeLL Reloaded. If you didn’t plug in an ethernet cable, take note of the ‘CPU Key’ on your screen. Its rather long, so I would suggest taking a photo.
If you connected an ethernet cable, take note of the IP address and type it into J-Runner in bottom right hand-corner and select ‘Get CPU Key’. This will grab CPU Key from XeLL and populate J-Runner with everything needed. At this point, you can switch off your console and plug back in your programmer.
Now you have your CPU Key, you will be able to make your hacked image. Click ‘Create XeBuild Image’ – and it’ll create your hacked image which you will write to your console.
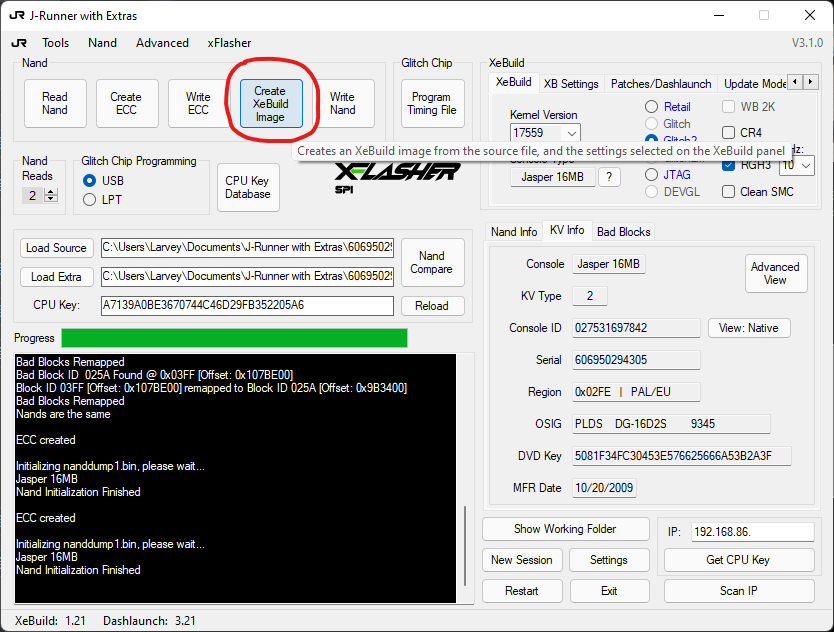
Once XeBuild image has been created, and the J-Runner log shows no errors – click ‘Write NAND’ and voila! You have completed your RGH3 hack on your console. Unplug your programmer and power on your console. If you power on with eject you should see XeLL.