Please keep in mind, this tutorial is designed for people who already have RGH experience. It is strongly not recommended to do a Zephyr as a first console. Do a Falcon or Jasper first.
Read NAND as normal (2 dumps, make sure they match)
J-Runner with Extras will auto load the correct Falcon ECC when you click Create ECC.
If you are using a different J-Runner, then load it manually from Custom Nand Functions. The file is located in common/ECC/FALCON.ecc
Then, write the ECC as normal.
Get the CPU key like normal after installing the chip.
Before clicking ‘Create XeBuild image’, J-Runner with Extras will automatically switch the motherboard to Falcon.
If you are using a different J-Runner, switch the motherboard to Falcon manually.
SMC+ is strongly suggested to improve booting performance

Because we removed the diode and put 1.8V, you must have the Xbox plugged into power in order to program the glitch chip. Or else it won’t work!
I recommend to start with 69.3 0.3. The best timings are:

Wire routing recommendations:
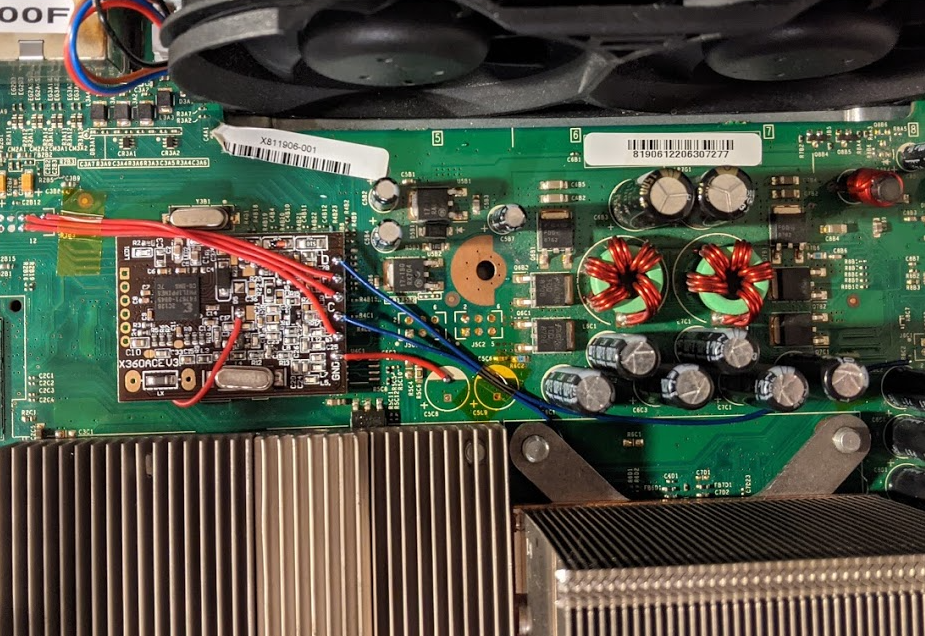
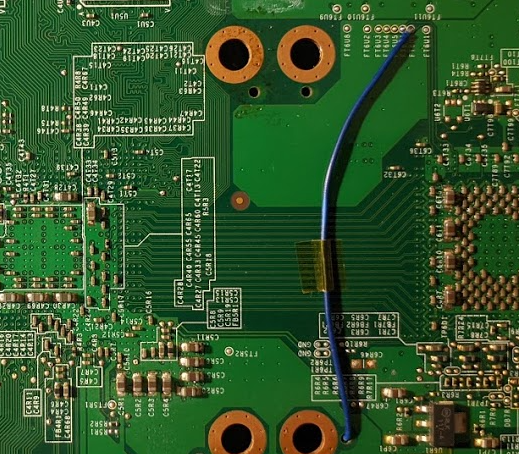
Chip placement, 1.8V point, GND to A/V port:
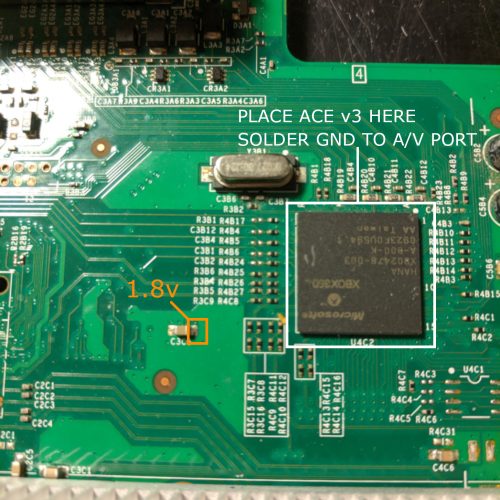
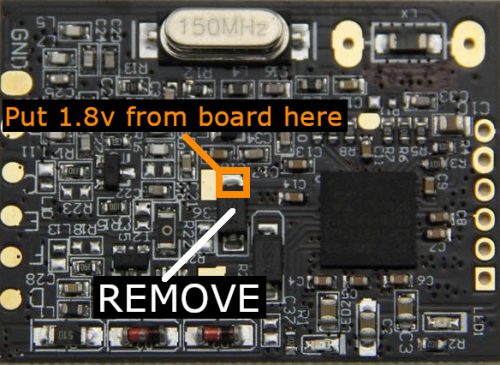
Solder wire from 1.8V on board to 1.8V point on ACE:
Remove the diode. Failing to do so will cause damage to your CPU
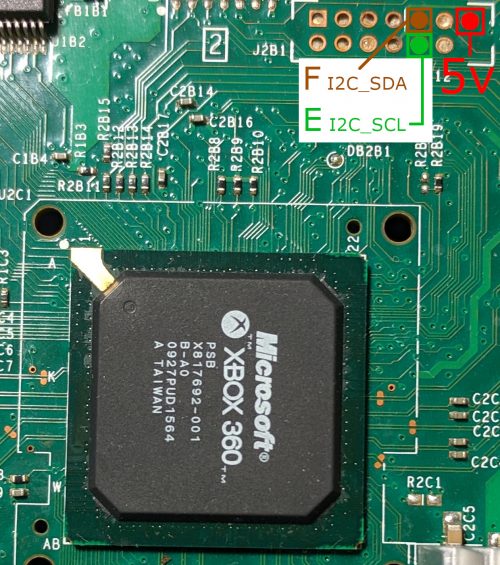
Solder 5V, E (SCL) and F (SDA):
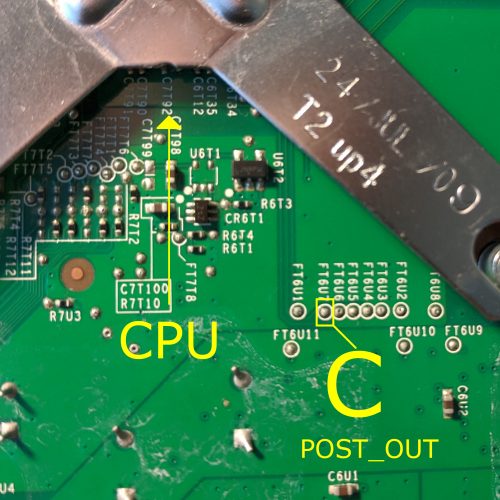
Solder C (POST_OUT):
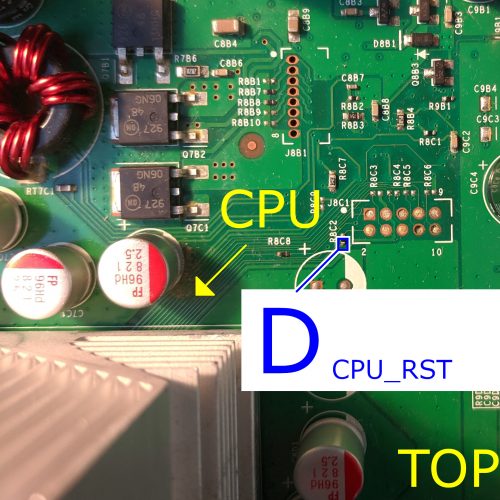
Solder D (CPU_RST):
© 2026 XBOX 360 HUB. Built using WordPress and the Mesmerize Theme